Hello and welcome to another insightful episode of SmartTips! I'm Gavin Brennen, a product specialist over at SmartSuite. Today, we’ll delve into an often-overlooked aspect of setting up your digital workspace — organizing record views. While we previously touched on formatting dashboards, today’s focus is on record views, which can often appear very unorganized if left unattended.
Why Record Views Matter
In our internal workings at SmartSuite, we've established guidelines to ensure that record views are always organized and neat. A cluttered record view can make it difficult to quickly find the information you need, ultimately affecting productivity.
"Keep everything sectioned off. Make sure that your display format matches the type of records that you want to be displaying."
By adhering to structured formatting techniques, you not only ensure clarity but also enhance the efficiency of your workflow.
The Starting Point: Project Management Solution
Our journey begins with a project management solution, which you can easily find in SmartSuite's template gallery. If you're following along with our templates, you’ll find them identical to the ones we’ll be working through.
Getting Started with Record Views
Let’s step into the tasks table. By opening a record view, you might notice that the layout is a bit chaotic. But don’t worry, we’re here to fix that.
Deciding on Your Layout
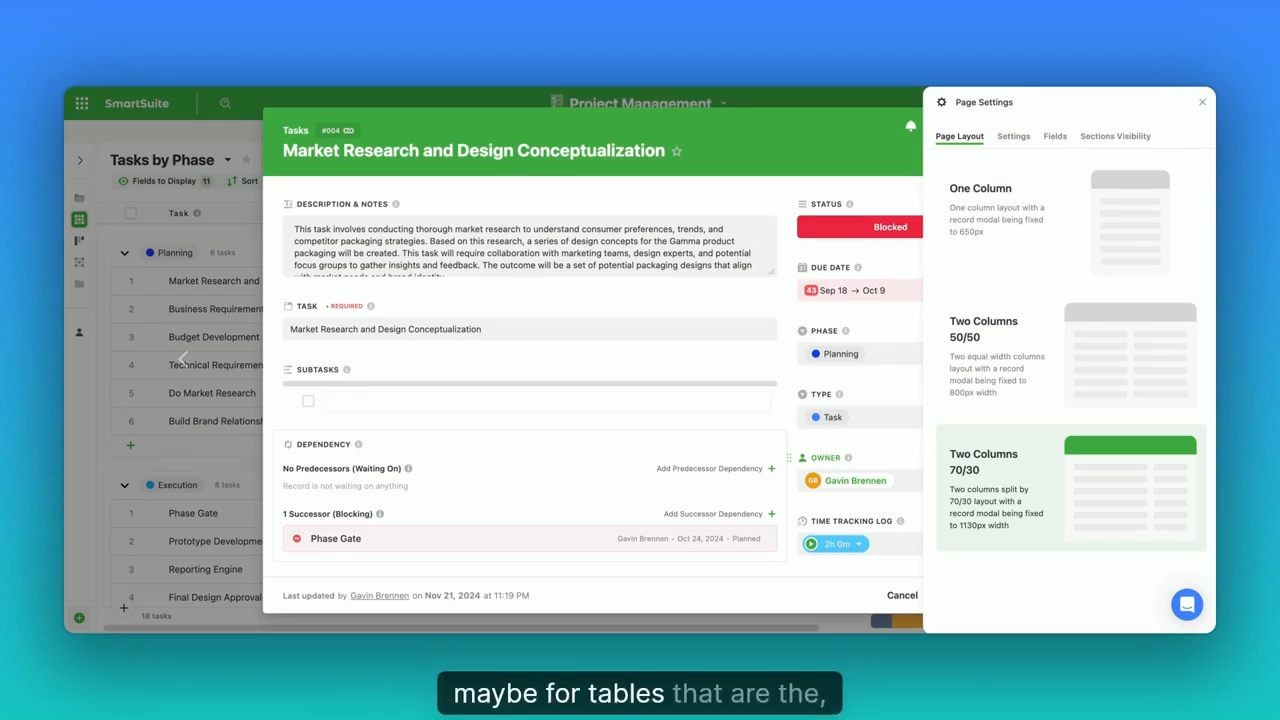
One of the first steps to organizing your record views is determining the layout. Navigate to the page settings where you’ll find three layout options:
- One Column: Suited for small subtasks or tables with minimal data. Everything spans equal width.
- Two Columns 50/50: Ideal for most situations for an even distribution.
- Two Columns 70/30: Recommended for projects with extensive data, like tables that sit at the top of dependency chains.
For today’s guide, we’ll stick with the versatile 50/50 layout.

Adding Sections: Structure Within Records
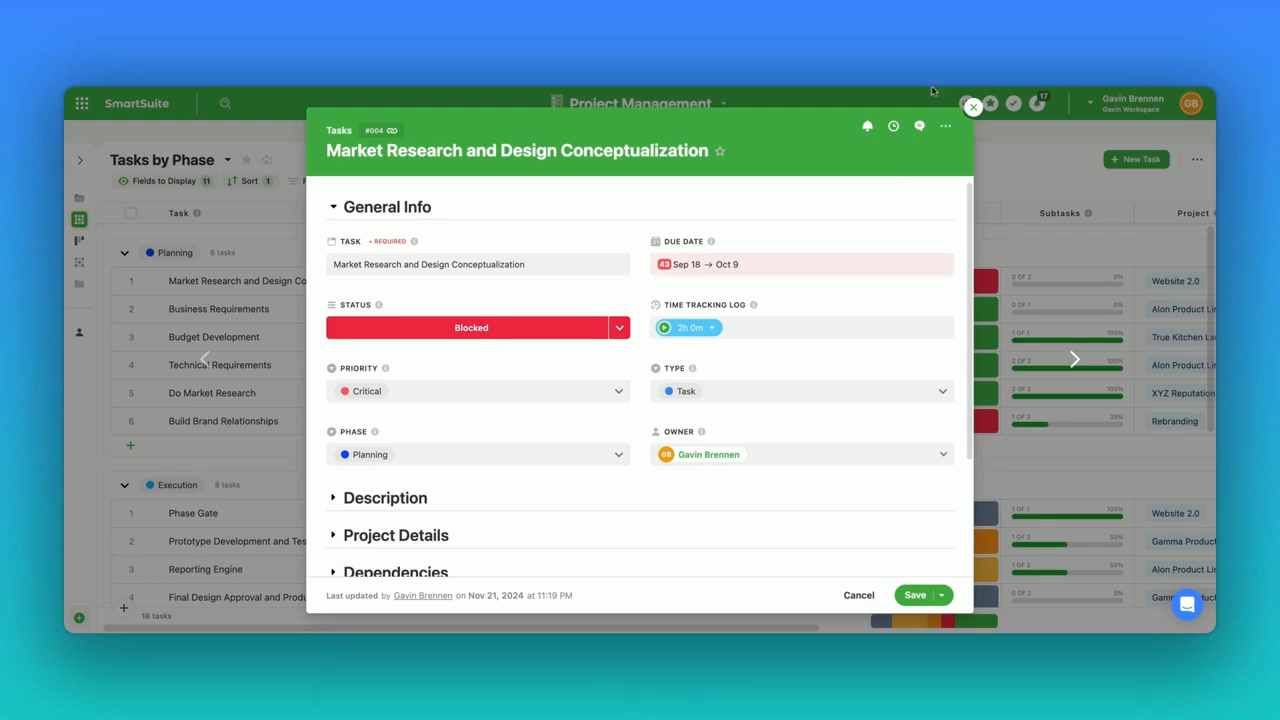
Sections in a record view act like folders for your fields, letting you logically group similar fields for easy access.
How to Create Sections
- Navigate to any field within your task.
- Access the Action menu and select "Add a section."
- Create a section, for example, "General Info."
By creating sections such as "General Info" and "Description," you can easily toggle visibility to focus on the most relevant data at any given time.

Working with Linked Records
Linked Records are a powerful feature within record views, enabling you to display associated data in a format that's meaningful to you. Instead of a plain list, you can switch up the display format.
Customizing Display Formats:
- Table Display: This is a personal favorite of mine. It centralizes all linked records, offering a consolidated view without the need for separate lookup fields.
Creating Logical Sections
Now that you understand how to form sections, make sure each one has a clear purpose:
- Dependencies
- Subtasks
- Project Details
These can ensure you have a strong central source of truth for each record.

Conclusion: The Path to an Organized Record View
Following these steps results in a well-organized record view, turning chaos into clarity. This way, data is not just stored — it's accessible, understandable, and actionable.


.jpg)


.jpg)


