


Importing Files into SmartSuite
Hello and welcome to another episode of Smart Tips! I'm Jeff Gonzalez, and today we're diving into the process of importing files into SmartSuite. If you manage projects using spreadsheets and want to seamlessly transfer that data into SmartSuite, you've come to the right place. Let's walk through some essential tips and tricks for a smooth import process.
Setting Up Your Fields in SmartSuite
First things first, let's talk about fields. These are the various types of information you plan to collect during the import process. You have the flexibility to create these fields beforehand or during the import.
Pro tip: Ensure that the titles of these fields exactly match the column names in your spreadsheet. This small detail will make a big difference, as you'll see shortly.
Here's a quick example of fields in SmartSuite:
- Field A: Project Name
- Field B: Stage
- Field C: Comments
- Field D: Type
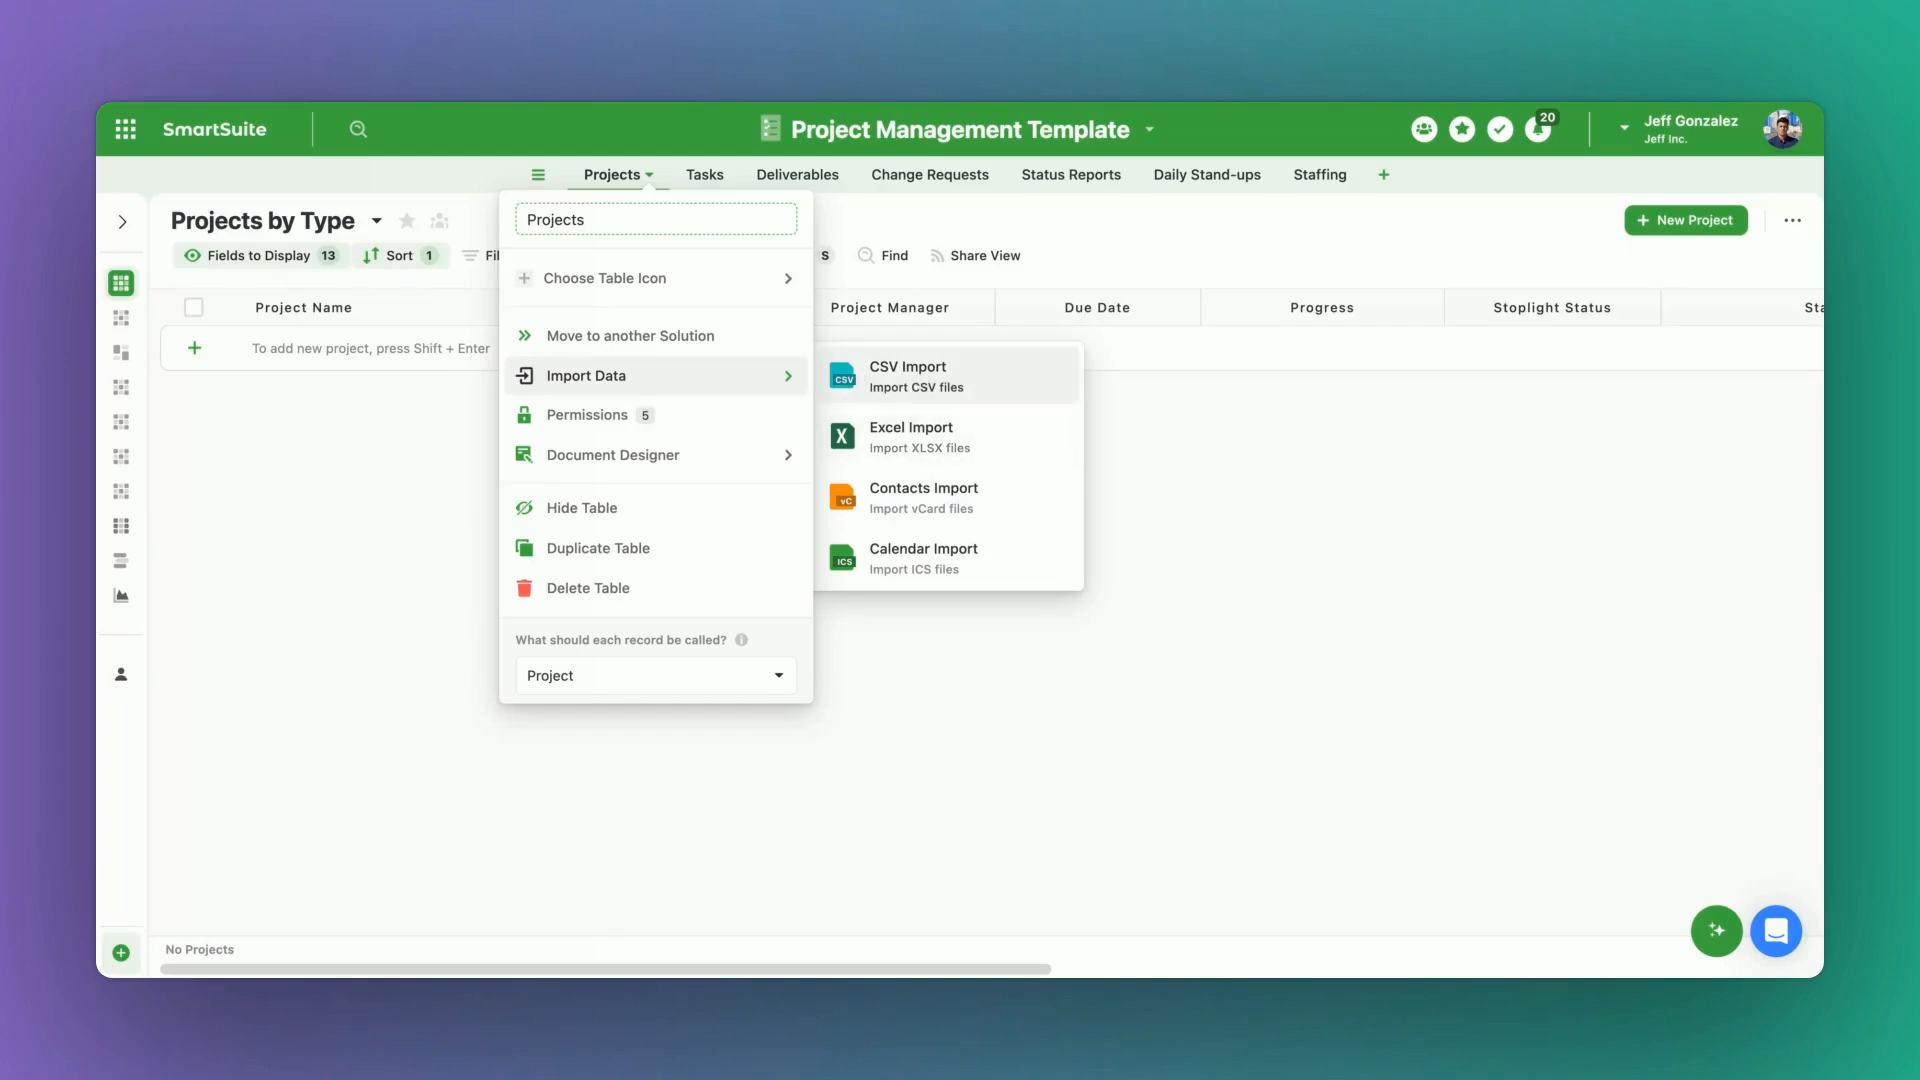
Finding the Import Wizard
To start the import, navigate to the table dropdown menu, hover over "Import Data," and select the file type you're importing. In this tutorial, we'll use a CSV file. Once you choose your file, you'll see a screen for mapping the columns from your CSV to the fields in SmartSuite.
For instance:
- Left Side: Fields in SmartSuite
- Right Side: Columns in your CSV file
Your job is to align them properly, like this:
- Project Name → Project Name
- Stage → Stage
Aligning Fields During the Import
At this stage, SmartSuite will automatically map fields that have exact title matches with your CSV columns.
For example:
- Project Name aligns directly with Project Name
- Stage aligns directly with Stage
If there are columns you don't want to import, like "Open Comments," simply click the trash can icon next to them. For unmapped columns like "Type," you can either map them to existing fields or create new ones.

Reviewing and Finalizing Your Import
Before finalizing, you get a chance to review any potential errors. You can correct any issues directly within the import wizard.
Steps for Error Correction
- Check the number of rows with issues.
- Click on the error rows to make changes directly within the cell.
- Once all errors are fixed, click the "Import" button in the bottom right-hand corner.

Ensuring Correct Data Import
Now, let’s talk about ensuring that your data is correctly imported, especially for linked record fields. In situations where you don’t have record titles exactly matching the values you're looking to import, it's often best to create another text field and fix those one-off values. This will allow you to copy and paste and directly link those values appropriately.
Common Scenarios and Solutions
Scenario: Build Hours field doesn’t exist yet.
Solution: Create a number field to represent Build Hours for the project.
Scenario: Due Date fields for Start and End are unmapped.
Solution: Map them directly to existing fields within SmartSuite.
After the Import
Once the data is imported, confirm that all newly created fields, like Build Hours and Type, have been correctly uploaded. Now, you are all set to work with your team in SmartSuite!
Important Notes:
- Ensure that linked records are accurately matched.
- For unmatched records, create a text field to manually correct them.
SmartSuite provides work platform for standardizing workflows in the following areas:
- Governance, Risk & Compliance
- IT & Service Ops
- Project / Portfolio Management
- Business Operations


