


How to Create an Interactions Table in SmartSuite to Track Texts, Emails, and Meetings
Welcome back to another episode of SmartTips! I’m Gavin Brennen, a Product Specialist here at SmartSuite, and today we’re diving into how to build an Interactions table inside your workspace. This feature lets you log texts, emails, and meetings—linked directly to your Contacts and Opportunities—so you always have a clear view of your communication history.
Whether you’re manually entering activity or building automations to streamline it, this guide will show you how it’s done from start to finish.
What Is an Interactions Table?
An Interactions table is a custom-built table inside your SmartSuite solution that lets you track every touchpoint—calls, emails, meetings, texts—and link them back to the people and deals they’re related to.
This is especially helpful if you’re using SmartSuite as a CRM and want to see all communication with a contact in one place.
In this walkthrough, we’ll build an Interactions table using the Sales CRM template as our starting point.
Start with the Sales CRM Template
Before we build the table, we need a base solution. Here's how to get the Sales CRM template:
- Click Add New Solution or go to the Template Gallery
- Search for Sales CRM
- Click Use Template to bring it into your workspace
This gives us the foundational structure with tables like Contacts and Opportunities, which we’ll link to in our Interactions table.

Creating Your Interactions Table
Let’s build the table from scratch.
- Create a new table and name it Interactions
- Delete the default fields so we can start clean
This table will log all your communication—whether added manually or through automation.
Add Core Fields
Next, let’s add the fields we need to make this table functional:
- Single Select – This will be your Type of Communication
Start with options like:- Meeting
- Linked Record – Link this to the Contacts table
So each interaction is tied to a person in your CRM - Assigned To – This field shows who is responsible for the activity
(e.g., the rep who sent the email) - Smart Docs – This is your Content field
Use it for summaries, email bodies, or meeting notes - Created Date – Display the existing First Created field
You’ll use this to sort interactions by date
Auto-Generate the Title Field
Now let’s make the record titles useful and consistent.
Modify the Title field so it auto-generates like this:
[Linked Contact] – [Type of Communication] – [Created Date]
For example:
Justin Dryer – Email – April 11, 2025
This gives you a quick snapshot of the interaction details right from the record name.
Sort by First Created
To keep things in chronological order, go to your view settings and sort records by the First Created field.
This helps you easily track the history of interactions in the order they happened.
Adding Interactions Manually
Now that your table is ready, you can start logging interactions manually.
Let’s create one:
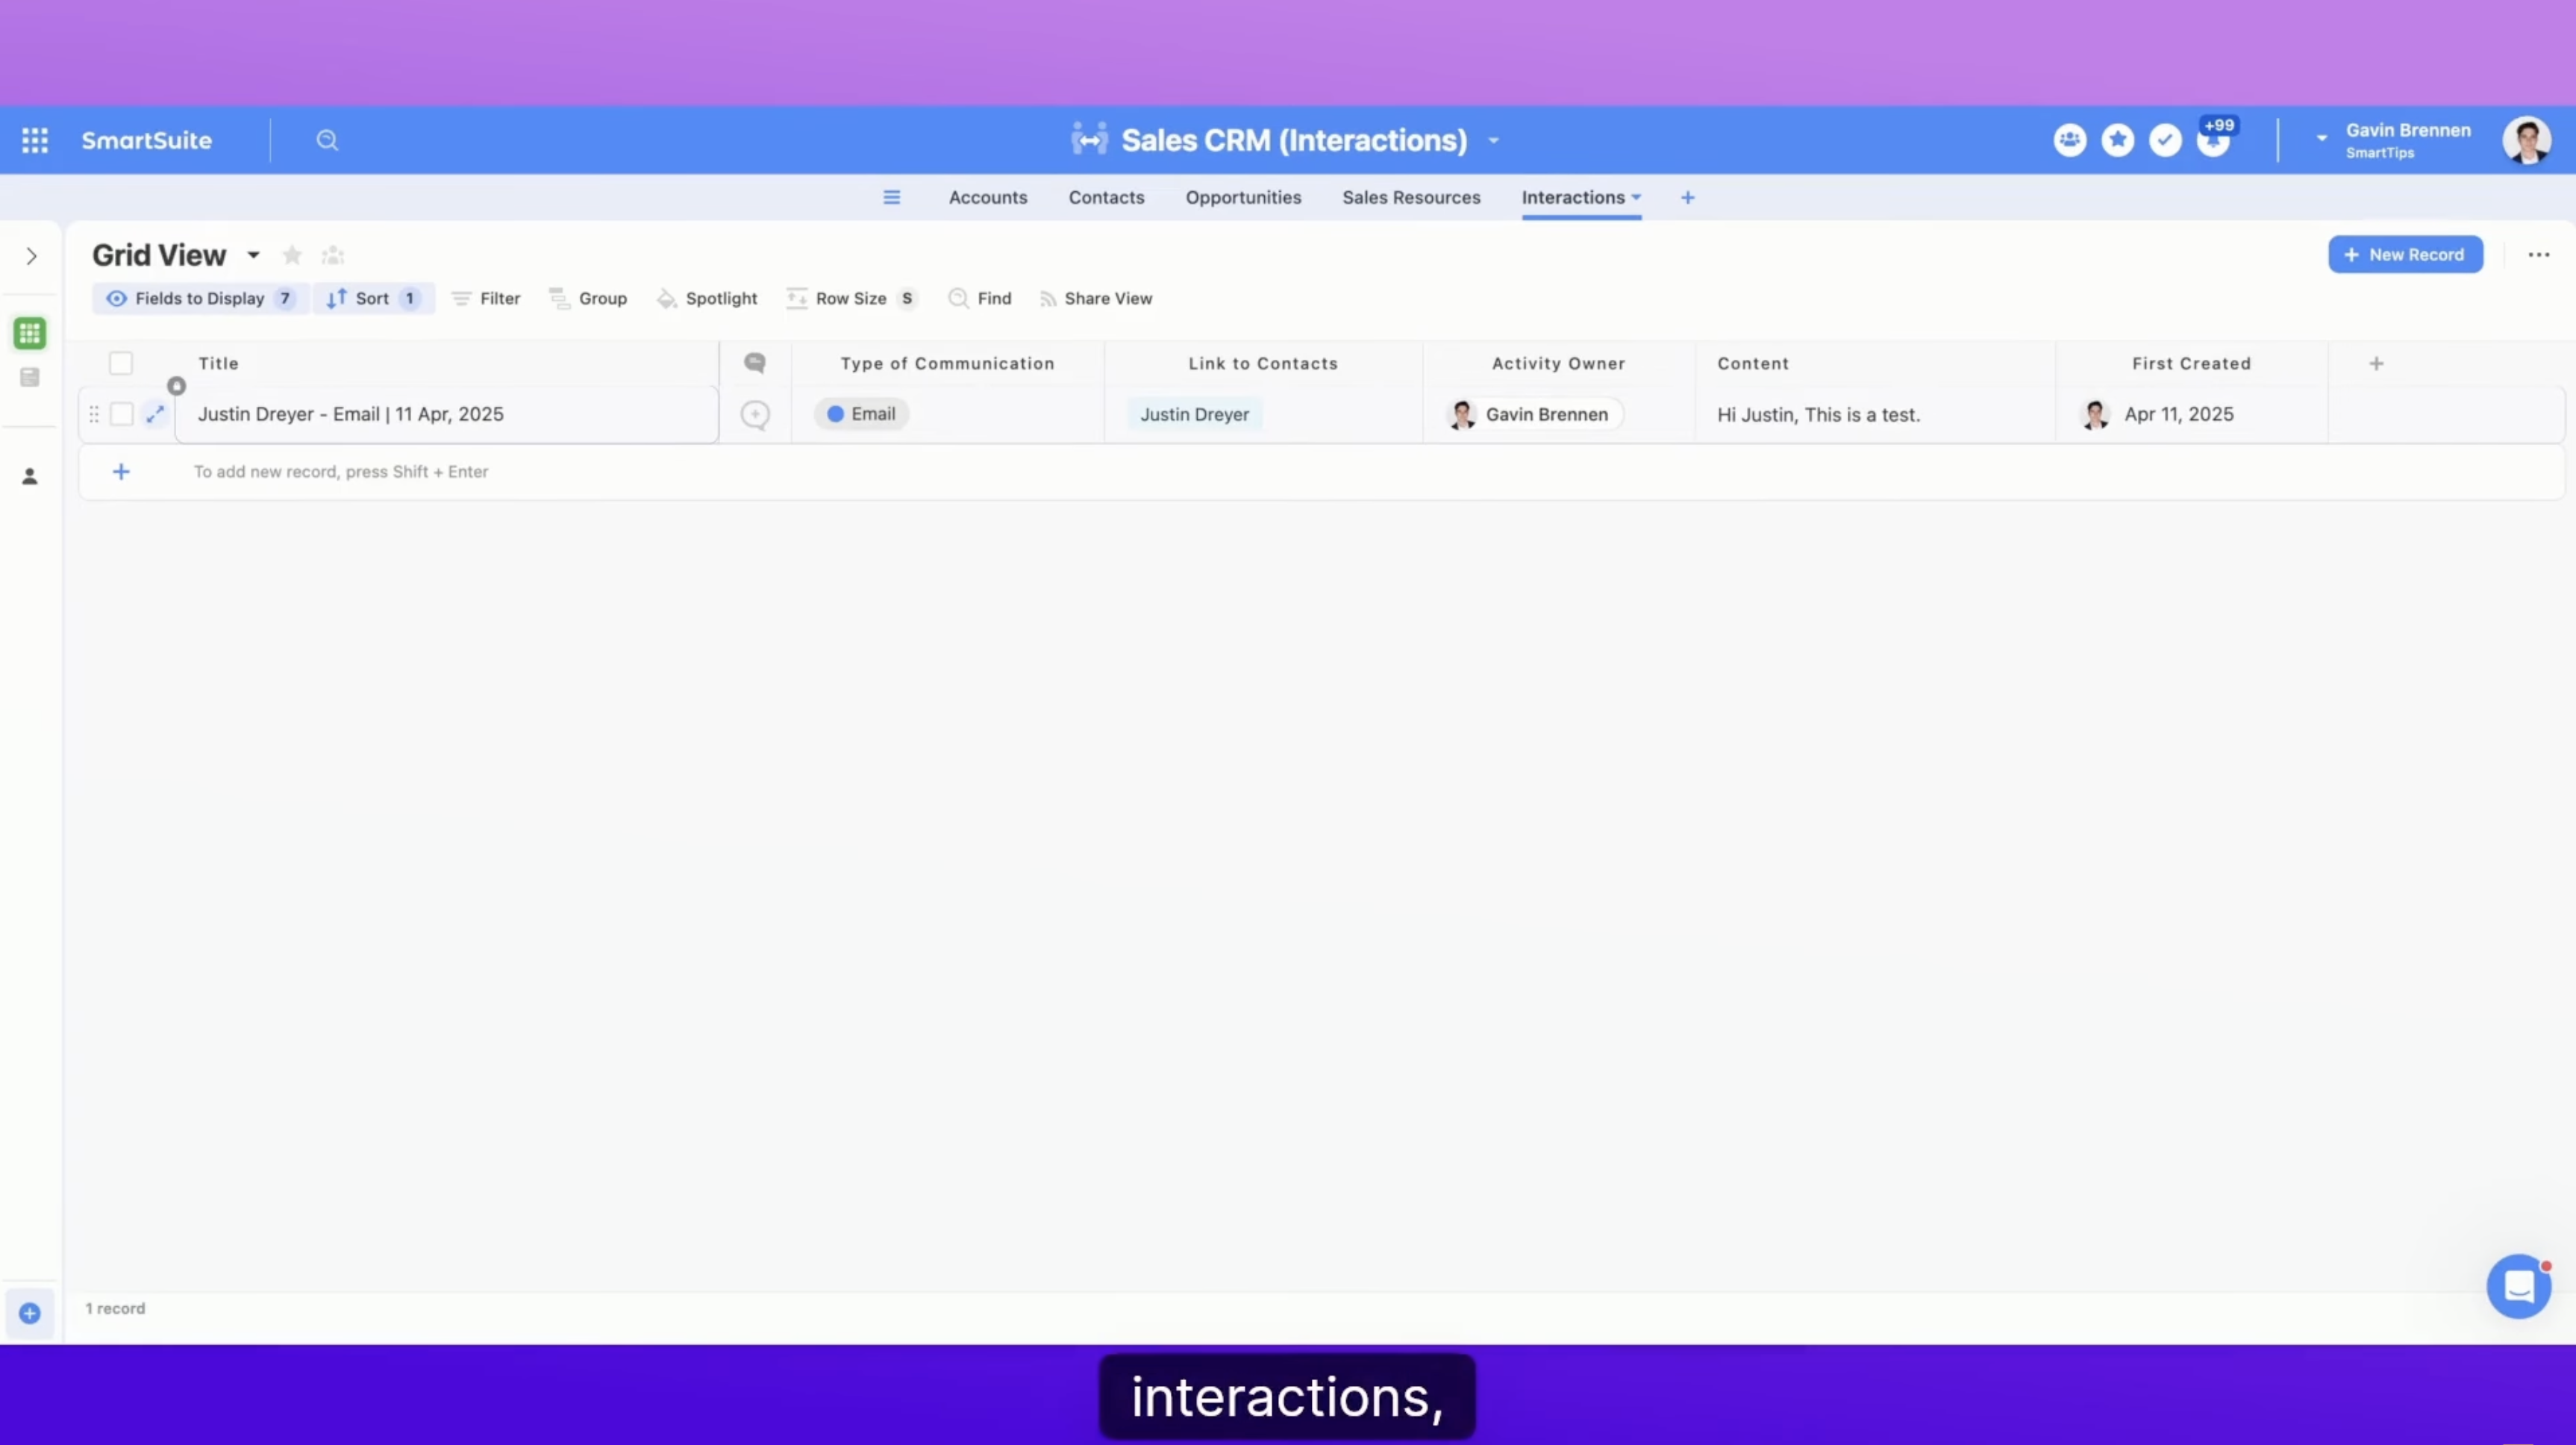
- Add a new record in Grid View
- Select Email as the type
- Link the contact (e.g., Justin Dryer)
- Assign yourself as the activity owner
- Paste in some content (e.g., “Hi Justin, this is a test…”)
Just like that, SmartSuite generates a titled record:
Justin Dryer – Email – April 11, 2025
This is now linked to Justin's contact profile for easy tracking.
Automating Interactions
Want to streamline your workflow even more? You can log interactions automatically using SmartSuite Automations.
Here’s an example:
- Trigger: A record in the Opportunities table changes to “Closed Won”
- Action 1: Send an email
- Action 2: Create a new record in the Interactions table
In that second action, you’ll:
- Assign the same owner
- Paste in the content of the email
- Link it to the contact from the triggering record
Now, every time you send an email via automation, a record of that interaction is automatically saved.
Going Further with Third-Party Integrations
Want to take automation to the next level?
Use tools like:
- Make
- Zapier
- Ply
These platforms can help you:
- Log incoming and outgoing emails automatically
- Capture calendar meetings
- Sync messages and calls from third-party platforms
This allows you to create a two-way sync between SmartSuite and external communication tools—turning your Interactions table into a full communication hub.
Final Thoughts
The Interactions table is a simple yet powerful way to track your communication across contacts and opportunities—all in one place.
Here’s a quick recap:
- Start with the Sales CRM template
- Build a custom Interactions table from scratch
- Add fields for communication type, contact link, owner, content, and date
- Customize the title field for clear record naming
- Sort by date to track history
- Use automations to log emails and interactions automatically
- Integrate with third-party tools for full coverage
If you’ve got questions about automations or want help setting this up in your workspace, drop a comment—we’d love to help out.
Until next time, keep enjoying SmartSuite!
SmartSuite provides work platform for standardizing workflows in the following areas:
- Governance, Risk & Compliance
- IT & Service Ops
- Project / Portfolio Management
- Business Operations


