


.png)
Mastering Time Tracking in SmartSuite
If you're looking to start using SmartSuite's Time Tracking Log field, whether it’s for measuring time on tasks, building project-level rollups, or creating timesheets, this SmartTips guide has you covered.
Hi, I’m Gavin Brennen, a Product Specialist here at SmartSuite. In this episode, we’ll walk through everything you need to know to get the most out of this powerful field type — so you can track time efficiently and streamline your workflows.
Getting Started: Where to Find It
We’ll be working in a Project Management template, which you can find in the SmartSuite's Solution Template Library from the SmartSuite Workspace homepage.
Step 1: Navigate to the Tasks Table
Once you're in the solution, head over to the Tasks table. Here you’ll find the Time Tracking Log field. This is a unique field type that lets users:
- Start a timer to automatically track time
- Manually log time retroactively
To add this field to your own solution:
- Create a new field by clicking the “+” button to add a new field.
- Type in "Time Tracking" and select the Time Tracking Log field from the Project Essentials category.
- Choose your display format:
- Pill style with color
- Clear style (no background color)
- For this example, let’s use the pill style with teal as the color.
Just like that, you’ve added a Time Tracking Log field to your table.

How to Use the Time Tracking Log
Now that your field is ready, let’s look at how to log time.
Option 1: Start the Timer
- Click the Start Timer button.
- The timer begins tracking time globally for that specific task.
- Click Stop Timer when you're done.
Option 2: Manually Add Time
- Click the dropdown on the field.
- Hit the plus (+) icon to log time manually.
- Enter a duration like
3h 30m, select the date, and add notes.
You can also add time via:
- Duration Input: Enter time like
2h 15m. - Date Selector: Mark when the time was spent.
- Note: Add a quick description of the work.
- Start-End Time Range: Log time using specific start and end points.
The field automatically sums all entries for a record, making it perfect for tracking total time spent on a task.
Tracking Time at the Project Level
So, what if you want to calculate total time spent across all tasks in a project?
Important Note:
SmartSuite's Rollup field does not support the Time Tracking Log field. But don’t worry — we’ve got a workaround!
Step-by-Step: Create a Formula Field
- Go to the Projects table.
- Add a new Formula field.
- Click Advanced Editor.
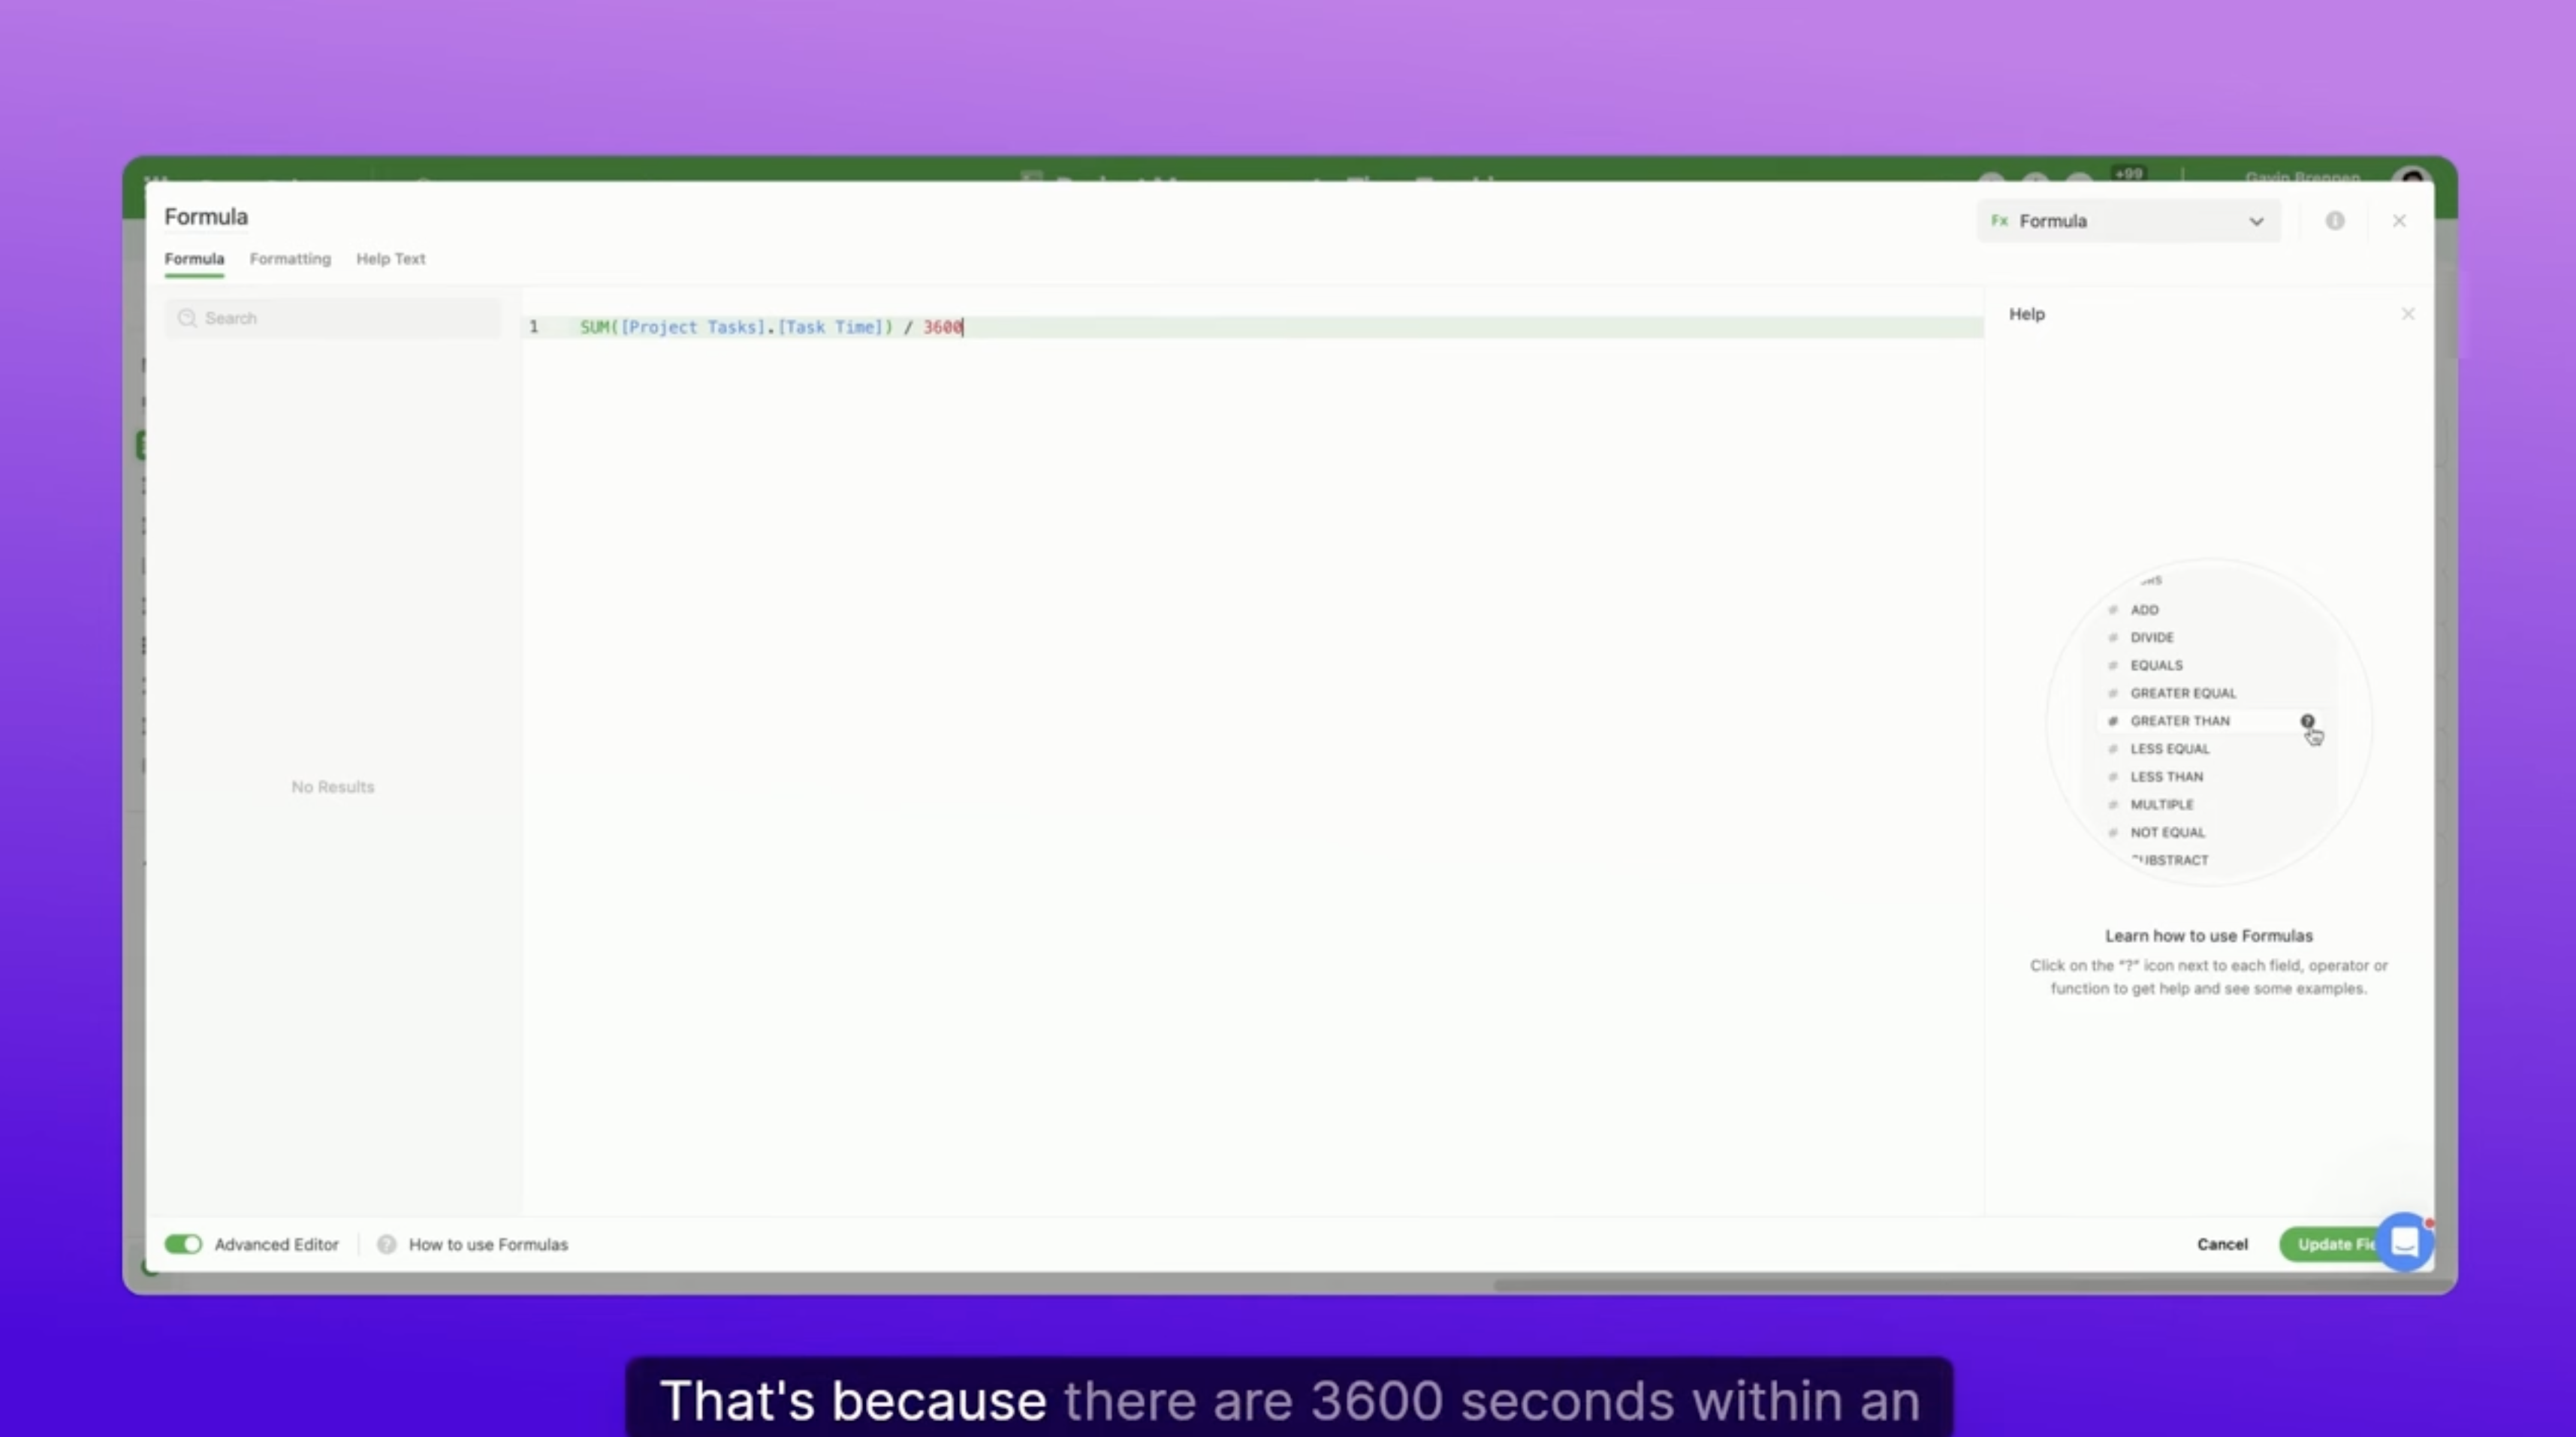
We're going to pull time from linked records using dot notation and sum it up:
SUM([Project Tasks].[Task Time])This formula pulls the time value from each linked task and totals it. But there's a catch - the result is shown in seconds.
Convert Seconds to Hours
To make it readable, divide the total by 3,600 (the number of seconds in an hour):
SUM([Project Tasks].[Task Time]) / 3600Now you'll see time in hours! Rename this field to something like "Total Project Hours".
Example:
If your tasks have the following time entries:
- Task 1: 3.5 hours
- Task 2: 2 hours
- Task 3: 1.5 hours
Your Total Project Hours formula will now correctly display 7 hours.
Expand to Timesheets and More
The real power of this feature comes when you link your time-tracked records to other tables — like:
- Projects
- Clients
- Team Members (Staffing Tables)
This opens the door to creating:
- Timesheets
- Client billing summaries
- Project efficiency reports
All using just the Time Tracking Log and a bit of formula magic.
Wrapping Up
That’s a wrap on SmartSuite’s Time Tracking Log field! Whether you’re logging individual task time or rolling it up to a project summary, this tool helps you keep a tight handle on your workflows.
Got questions? We’re always happy to help. And until next week, keep on enjoying SmartSuite!
SmartSuite provides work platform for standardizing workflows in the following areas:
- Governance, Risk & Compliance
- IT & Service Ops
- Project / Portfolio Management
- Business Operations


