


Linking Records From Form Submissions
Welcome back to another episode of SmartTips! I'm Jeff Gonzalez, and today, I'm excited to walk you through the process of linking records automatically after a form submission. If you've ever had requests coming into a table via a form and wanted to connect those requests to a person record without exposing everyone's names, this tutorial is for you. Let’s dive in!
First, let's get an overview of what we're working with:
Our Workspace Template
We're utilizing a personnel management template that's available in our template gallery. When added to your workspace, this template provides multiple tables. For today's purposes, I've hidden some of these tables because they aren’t relevant to our tutorial.
Adding a New Table
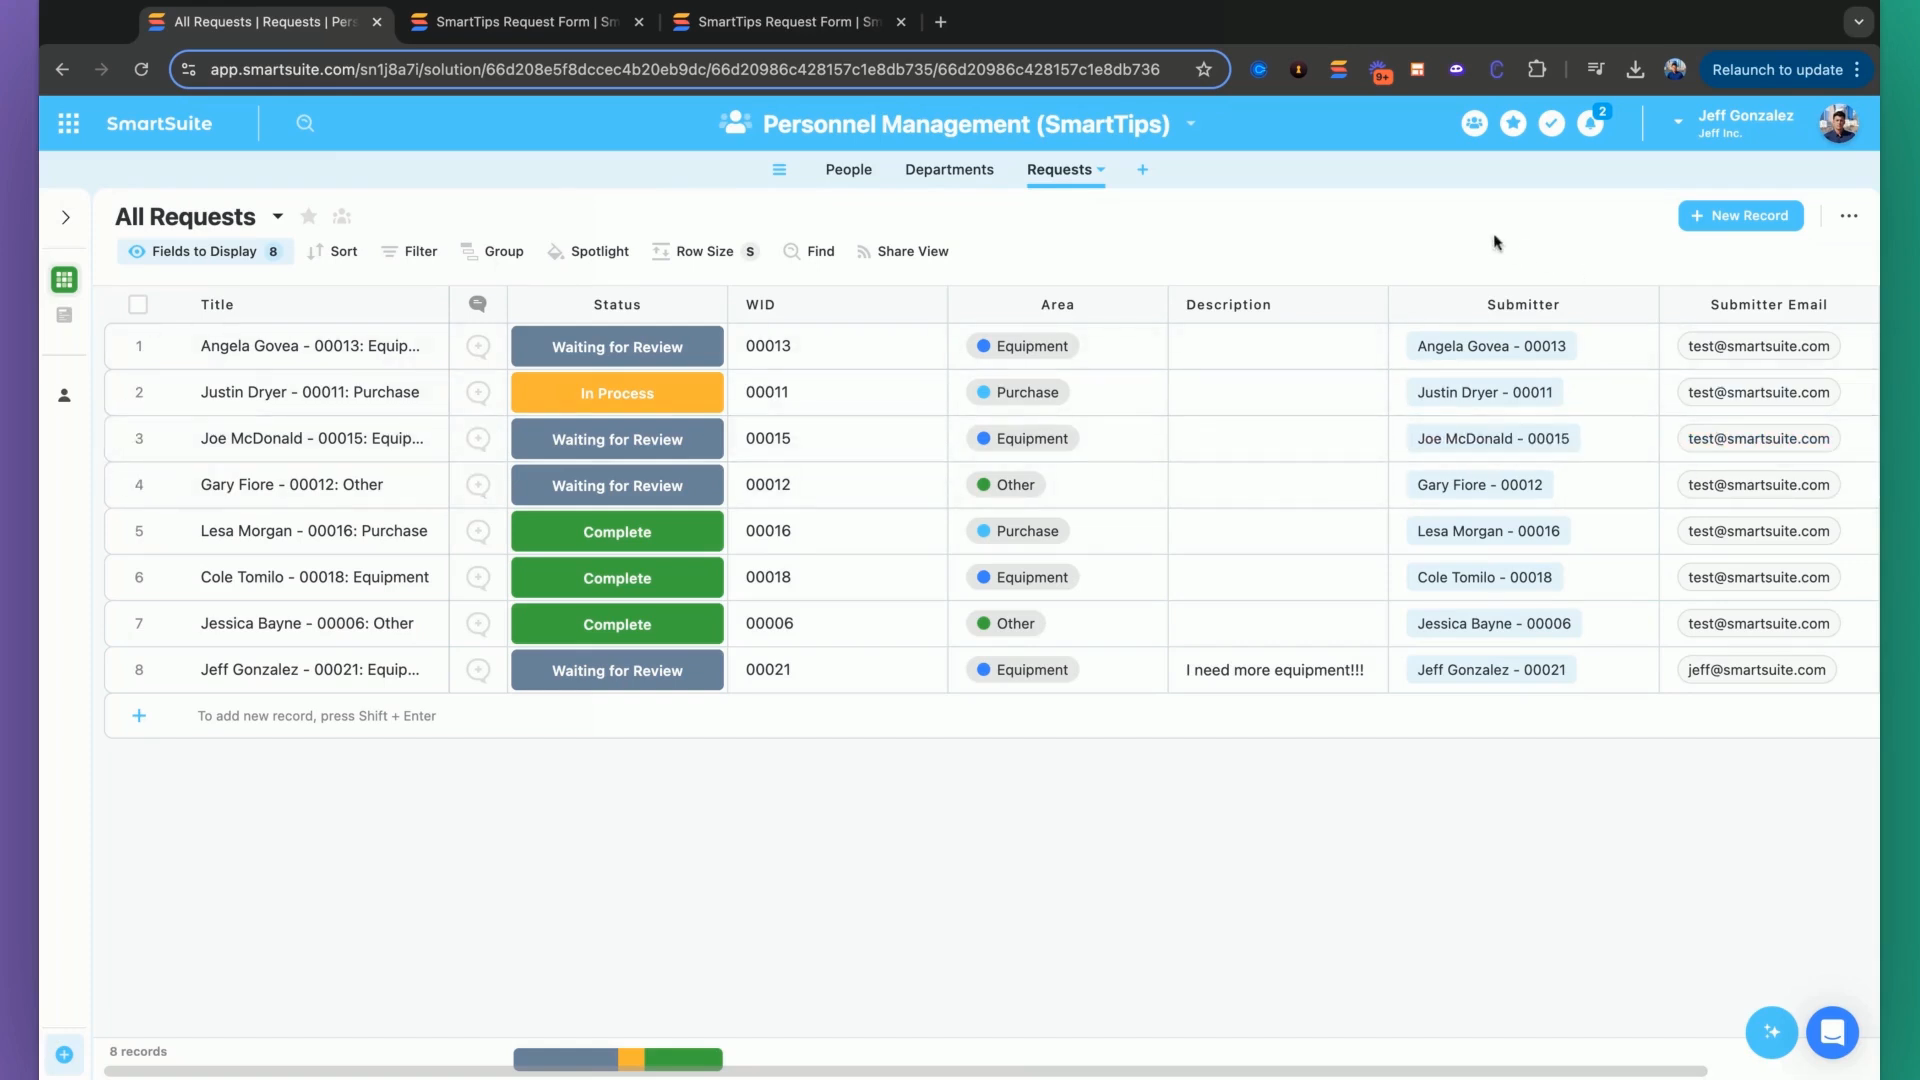
I've added a new table and named it Requests. You can always customize template solutions by adding or removing tables based on your specific needs.
Defining the Relationship
We want to connect a person in our People table to a request automatically. For this to happen, we'll ask users to provide a unique identifier - their work ID (Wid), a five-character code that uniquely identifies them.
| People Table | Requests Table ||-------------------|----------------|| Name | Wid || Wid (Work ID) | Area || Email | Description |
These WIDs in the people and requests tables must match for the system to recognize and link the records.
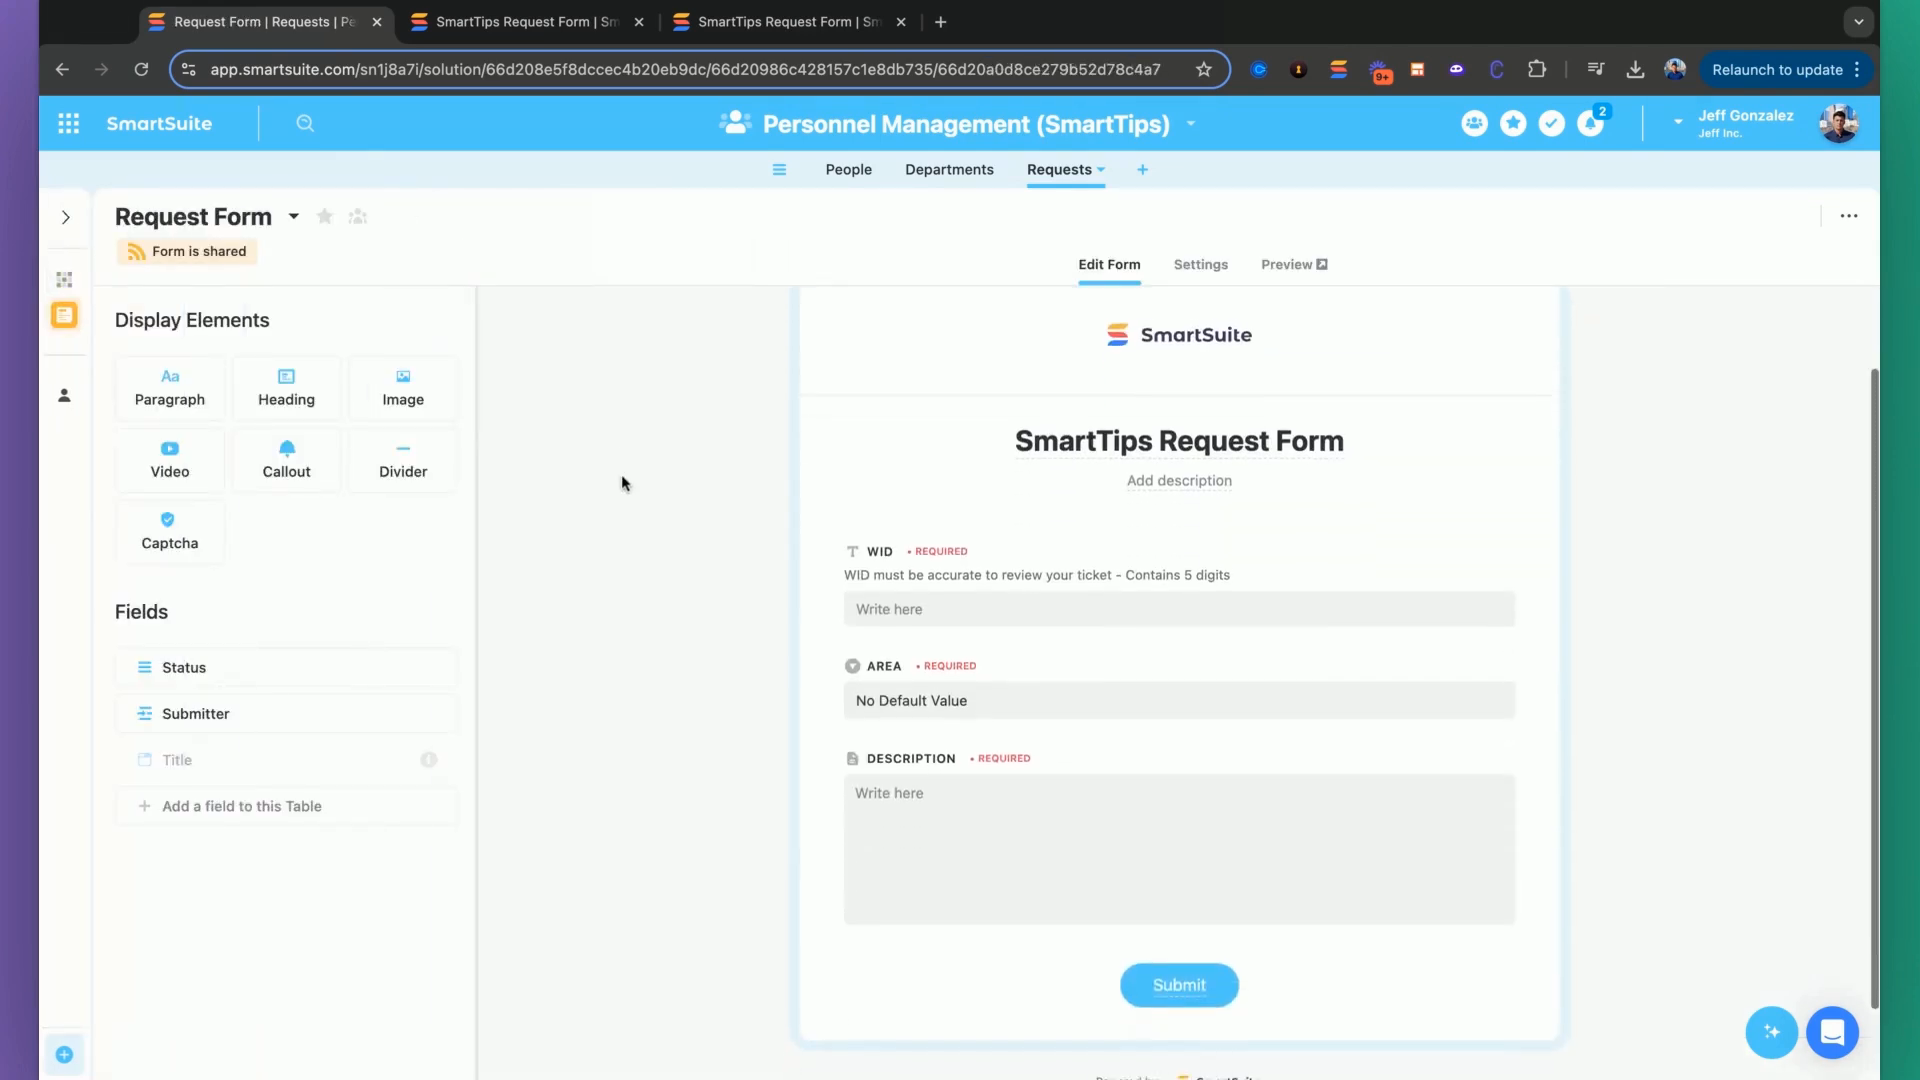
Preparing the Form
To capture requests, we'll use a form. Here’s how it’s set up:
Form Fields
- Wid - Work ID of the user
- Area - Single select field for the request area
- Description - Brief description of the request
- Status - Various status buckets
- Email lookup - Retrieves submitter’s email based on their Wid
We purposefully won’t include a field in the form for the submitter to manually select their name. We want to ensure privacy and avoid them seeing all possible submitters.
Automation Setup
Now, let's automate the record linking using Smart Suite's automation feature.
Step-by-Step Automation
Trigger: Set the trigger to when a new form submission occurs in the Requests table. Trigger: When a form is submitted
Find Record: Configure the automation to find a single record in the People table matching the submitted Wid. Condition: Match Wid from People with Wid from Request
Update Record: Update the submitter field in the Requests table with the linked record from the People table. Update: Submitter field in Requests with the found record from People

Putting It to the Test
Let’s see this in action. We’ll submit a sample form with the following details:
- Wid: 00021
- Area: Equipment
- Description: I need more equipment!
Upon submission, navigate to the grid view in the Requests table, and you will see the link established:
| Requests Table ||-------------------|| Wid: 00021 || Area: Equipment || Description: I need more equipment! || Submitter: Linked (Person with Wid 00021) |
This shows the automation works flawlessly!
Conclusion
By following these steps, you can efficiently link records after form submissions without compromising the privacy of your participants. This method is perfect for scenarios where external stakeholders or customers submit forms and you don’t want them to see others participating.
"Automation doesn’t just save time—it empowers us to focus on more meaningful tasks by handling the tedious work for us."
SmartSuite provides work platform for standardizing workflows in the following areas:
- Governance, Risk & Compliance
- IT & Service Ops
- Project / Portfolio Management
- Business Operations


