


Auto-Adjust Project Timelines
Welcome to another episode of SmartTips! I'm Jeff Gonzalez, and today I'm going to walk us through how we can auto-schedule our project timelines based on when the first and last tasks linked to that project are scheduled for. Let's jump in and see.
Here we have our project management template solution. I've hidden a handful of tables that aren't necessarily a part of what we're going to talk about today.
Setup: Projects and Tasks
Today, we're going to talk about, very simply, projects and tasks. We have a table of projects that are linked to a table of tasks. These go in sequential order based on the due date field that we have here. The goal is to adjust the due date for a project based on the first and last tasks assigned in the tasks table.

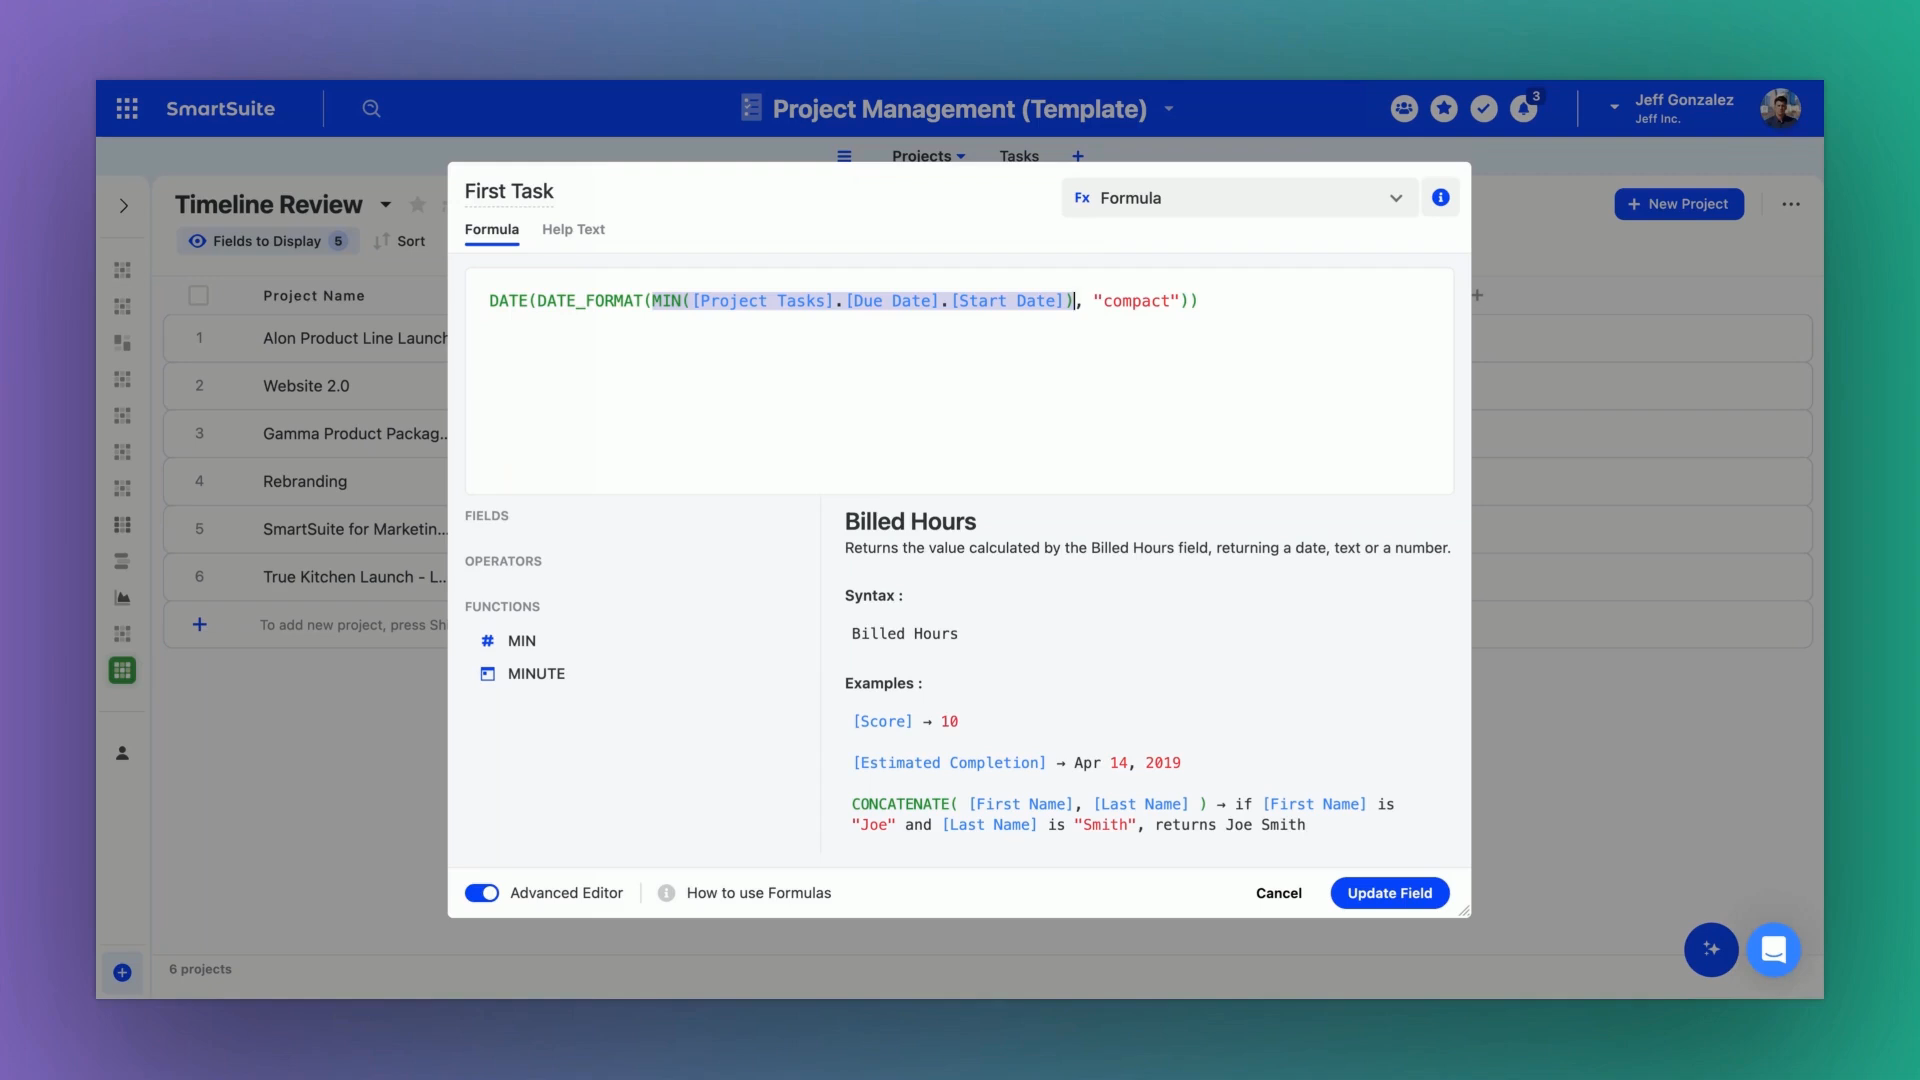
Creating the Timeline Review
To accomplish this, I've created an additional view that I call timeline review. This involves using a couple of different formulas to allow for this feature to work. Let's dive into the details.
Formula for the First Task
Firstly, we have the formula for the first task. Starting from the inside out, we want the minimum value, the lowest value, the earliest date for our project tasks. Specifically, we are pulling from the due date's start date.
MIN([Start Date Field])
Within that date field, we pull the minimum value of all linked tasks. This gives us the earliest start date linked to the project. Next, we format it to be recognized as a date element. The formula looks something like this:
DATEFORMAT(MIN([Start Date Field]), "MM/DD/YYYY")
This ensures the output is compact and ready to be used in automations.
Formula for the Last Task
Similarly, for the last task, we are interested in the maximum value of the end date. This value is also formatted in the same manner as the formula for the first task:
DATEFORMAT(MAX([End Date Field]), "MM/DD/YYYY")
Treating values as dates is crucial, especially when we need to utilize them in automations.

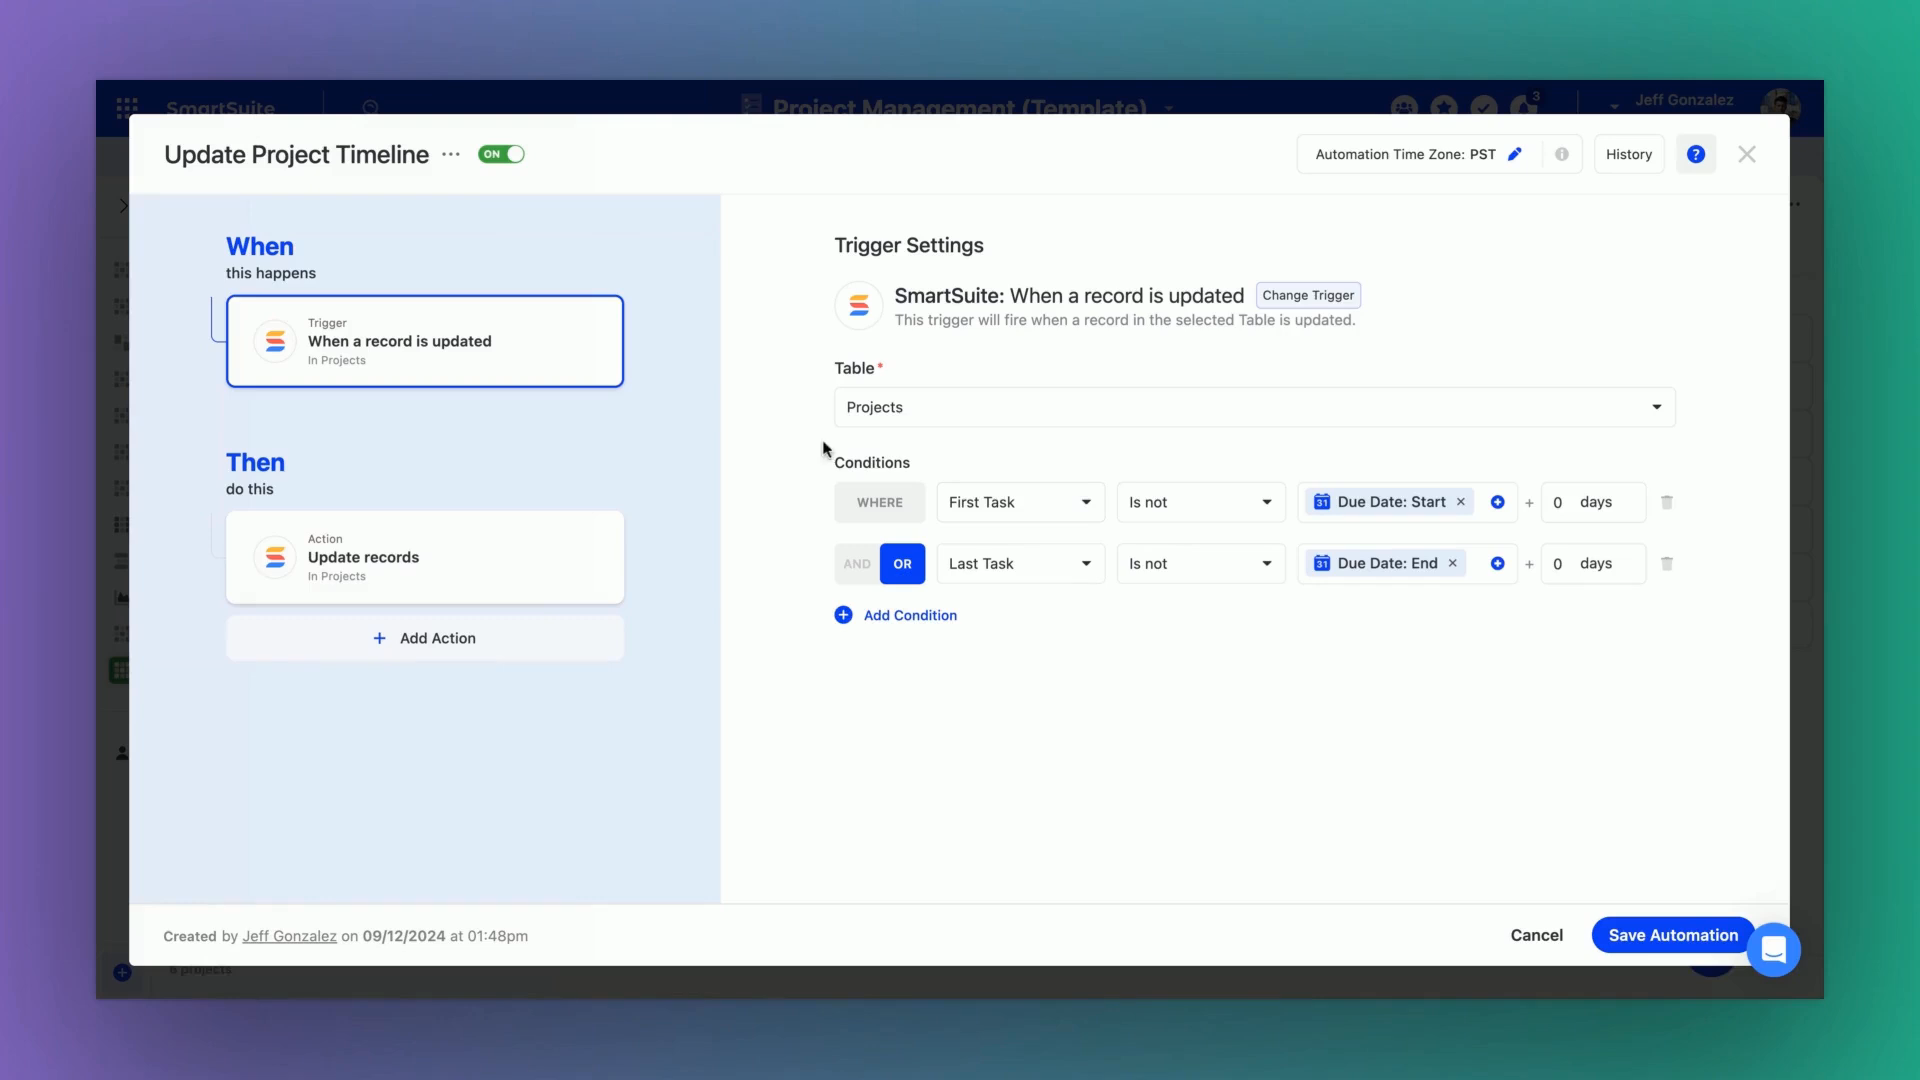
Automation Setup: Updating Project Timelines
What makes this setup tick is the automation we created, called update project timeline. This automation relies on a couple of conditions:
- If the first task's start date is not the same as the project's start date.
- If the last task's end date is not the same as the project's due date.
Whenever a record is updated and meets these conditions, the automation will adjust the project's timeline accordingly.
IF [First Task Start Date] != [Project Start Date] OR[Last Task End Date] != [Project Due Date]
This automation ensures that updates are continuous and accurate.
Implementation Variations
There are multiple ways to implement this solution. I chose this method as it efficiently updated existing values and made quick adjustments to records. However, another approach might involve setting a trigger when a record matches certain conditions, eliminating the necessity to interact with the project data manually.
How you decide to implement this will depend on your specific use case and how your team uses the project management tool.
Q&A and Closing Thoughts
Feel free to try out the steps above and see how they fit into your workflow. Every team's requirements are unique, so tailoring these scripts and automations might be necessary to make them work seamlessly with your data structure.
SmartSuite provides work platform for standardizing workflows in the following areas:
- Governance, Risk & Compliance
- IT & Service Ops
- Project / Portfolio Management
- Business Operations


