


.png)
Automating Document Creation
Welcome to another episode of SmartTips! Today we're diving into the world of automating document creation using SmartSuite. We'll explore how to dynamically populate documents with data from your Smart Suite records. We'll use a little bit of document designer and some automations, and it's going to be a fun ride. Let's dive in!
Introduction to the Project Management Template
In today's video, we'll be using the Project Management Template solution and focusing on the Projects Table. The goal is to automatically generate a project document when a project reaches the planning stage, as determined by the status field. We want this document to capture all the important details of the project without having to manually input this information each time.
Preparing the Document Designer
Creating the Document
First, we'll use the Document Designer to create our document. Here’s a step-by-step guide:
- Open Document Designer:
- Go to the table dropdown menu.
- Select the option to create a document.
- Customize Your Document:
- Add static elements like headings and text formatting (font size, type, and weight).
- Insert dynamic elements such as field values.
For instance, we may want the title to say "Project Plan" followed by the project name, which we can dynamically pull from the title field.

Integrating Linked Records
As we design our document, we can also include information from linked records. For example, if we have linked tasks to the project, we can pull in fields from these tasks. Here’s how:
- Select Table Mode:
- Choose which table columns to include.
- Resize and format these columns to fit within your document.
In our document, we'll include tasks, deliverables, due dates, owners, types, and task phases.
Automating the Document Creation
Setting Up the Automation
Once our document template is ready, we want to automate its creation and save it back into the SmartSuite record. Here's the workflow:
- Trigger Automation:
- Set the trigger for when a record is updated (specifically when the stage changes to planning).
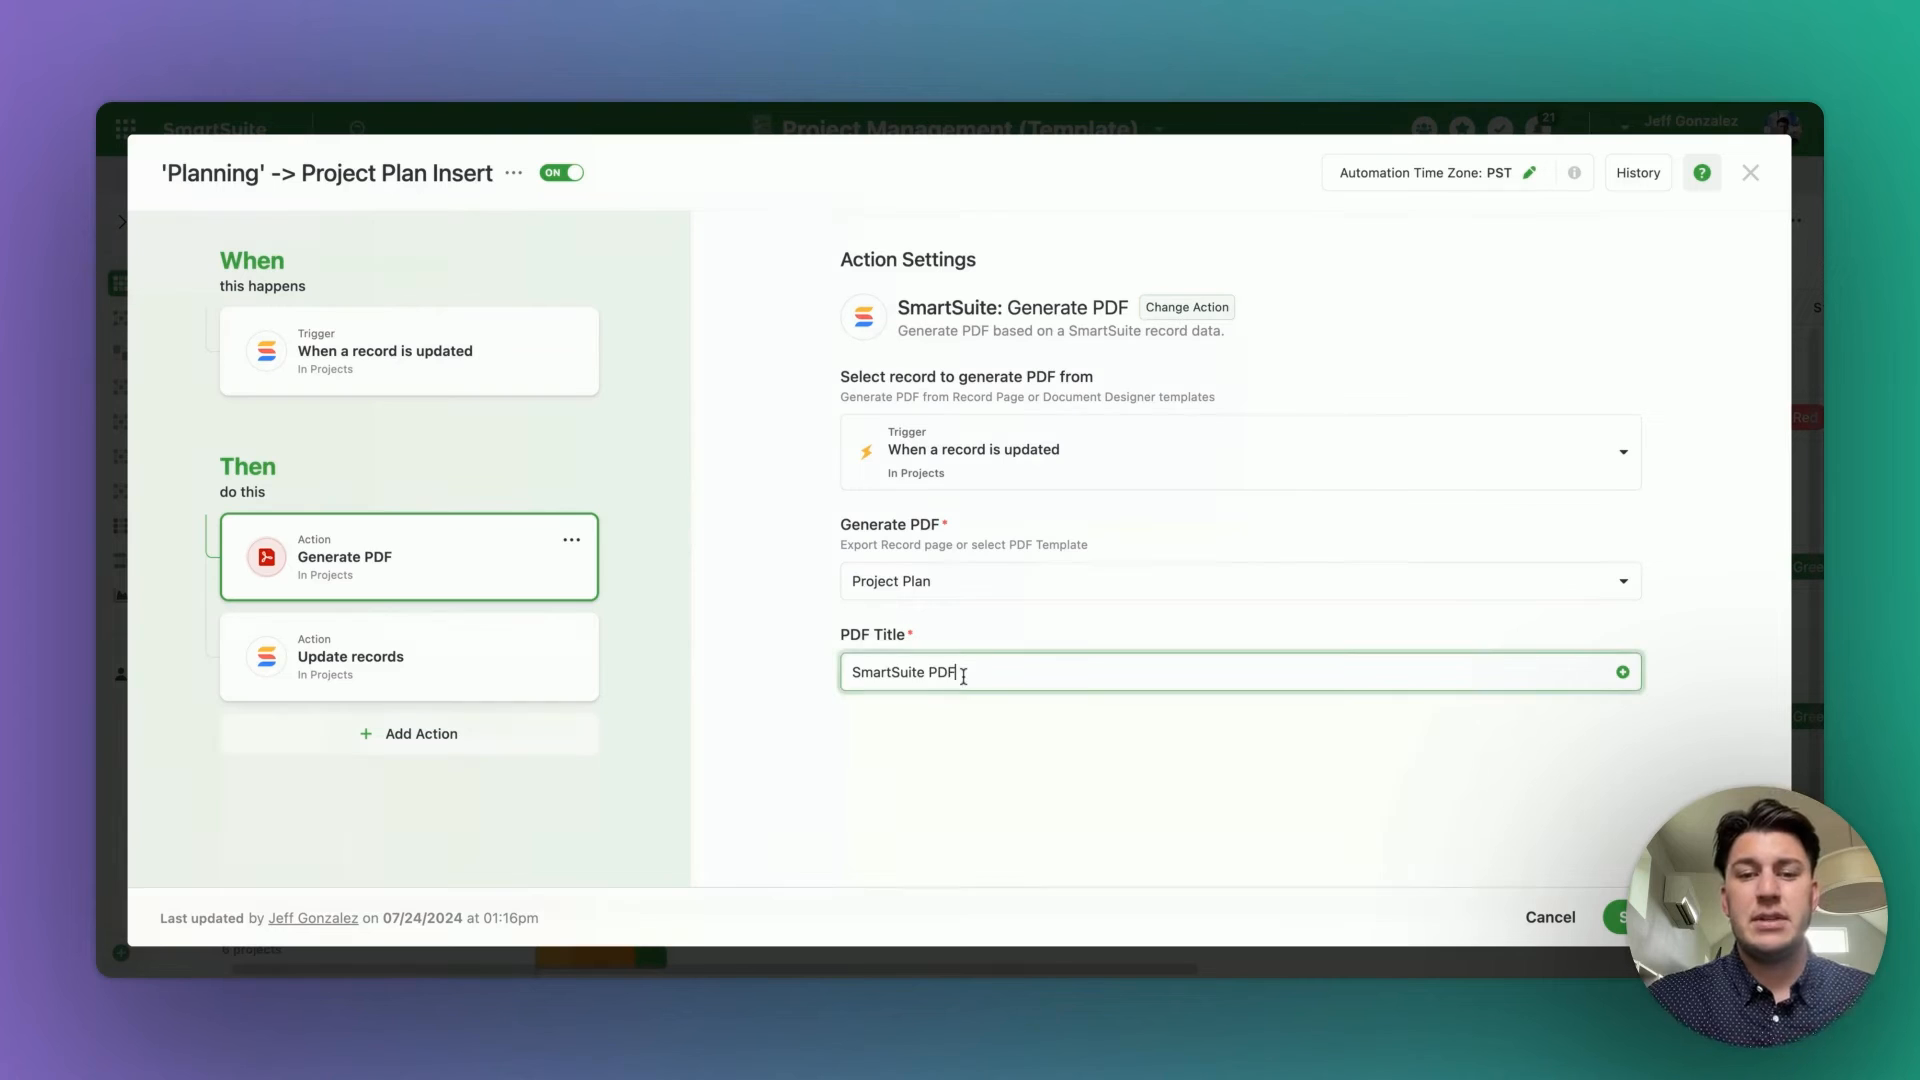
- Generate PDF Action:
- Use the Generate PDF action to choose the document template you created.
- Customize the file name using dynamic values (e.g., "Project Plan [Project Name]").
- Update Record with PDF:
- Append the generated PDF to the Project Documents cell of the record.
Here's a closer look at our automation setup:
- Trigger: When a record is updated, specifically when the stage changes to planning.
- Action: Generate a PDF using the selected document template. Name the PDF uniquely by including the project name.
- Final Step: Update the project record to append the new PDF to the existing documents.
Reviewing the Automation
Once the automation is set up, every time a project enters the planning stage, a PDF will be generated and saved in the project documents. This ensures that all project details are captured without manual intervention.
Practical Use Case
To see the automation in action, let's look at an example. Suppose we have a project called "TrueKitchen Launch Location Five." When this project reaches the planning stage, a PDF is automatically generated based on the document template and saved under the project documents.
Conclusion
Automating document creation based on record data not only saves time but ensures consistency and accuracy in project documentation. By leveraging SmartSuite's Document Designer and automation features, we can streamline our project management processes effectively.
To experience the future of work management firsthand, start your free SmartSuite trial today!
SmartSuite provides work platform for standardizing workflows in the following areas:
- Governance, Risk & Compliance
- IT & Service Ops
- Project / Portfolio Management
- Business Operations


