


SmartSuite Permissions
Hello and welcome to another episode of SmartTips! I'm Jeff Gonzalez, and today I'm going to walk us through how we can deliver permissions at every level of our solution. Let's jump in and build this out together to see what I mean. In this guide, I'll switch between two different aliases to show what it looks like from an account administrator/solution manager perspective and from the lens of an end user who is being granted those permissions.
Let's start first with the solution-level permissions.
Understanding Solution Level Permissions
When you create your solutions in SmartSuite, everything is set to private by default. This means only account administrators have access to your solutions. To allow others to access them, you'll need to adjust the permission settings. Let's go ahead and click on the advanced permission selection to see our options.
Types of Permissions
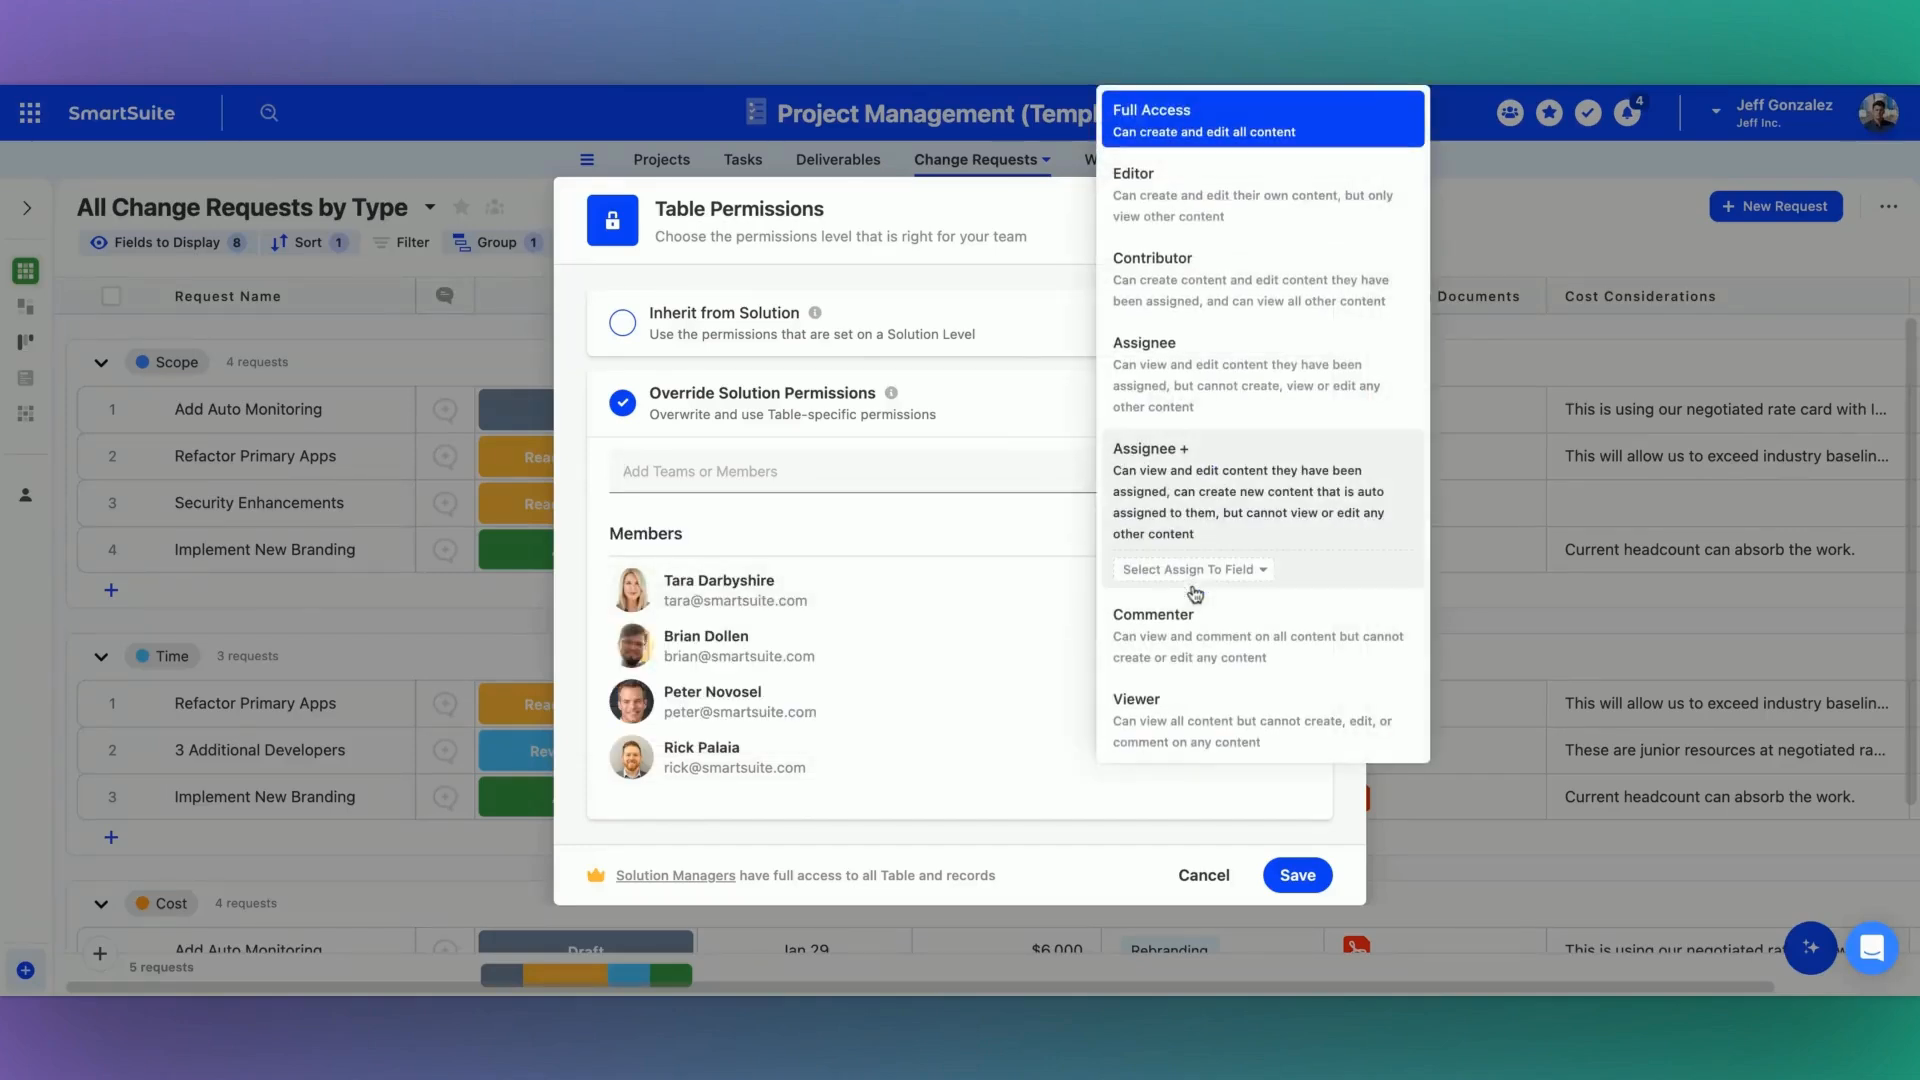
In the advanced permissions menu, you have several options to grant access to different users:
- Editors: Users who can make changes to the content.
- Contributors: Users who can add new content but not change existing content.
- Assignees: Users who are assigned specific tasks.
- Commenters: Users who can leave comments.
- Viewers: Users who can only view the content.
Each role comes with a brief description of their permissions. For a full explanation of each permission level, you can refer to our help articles.
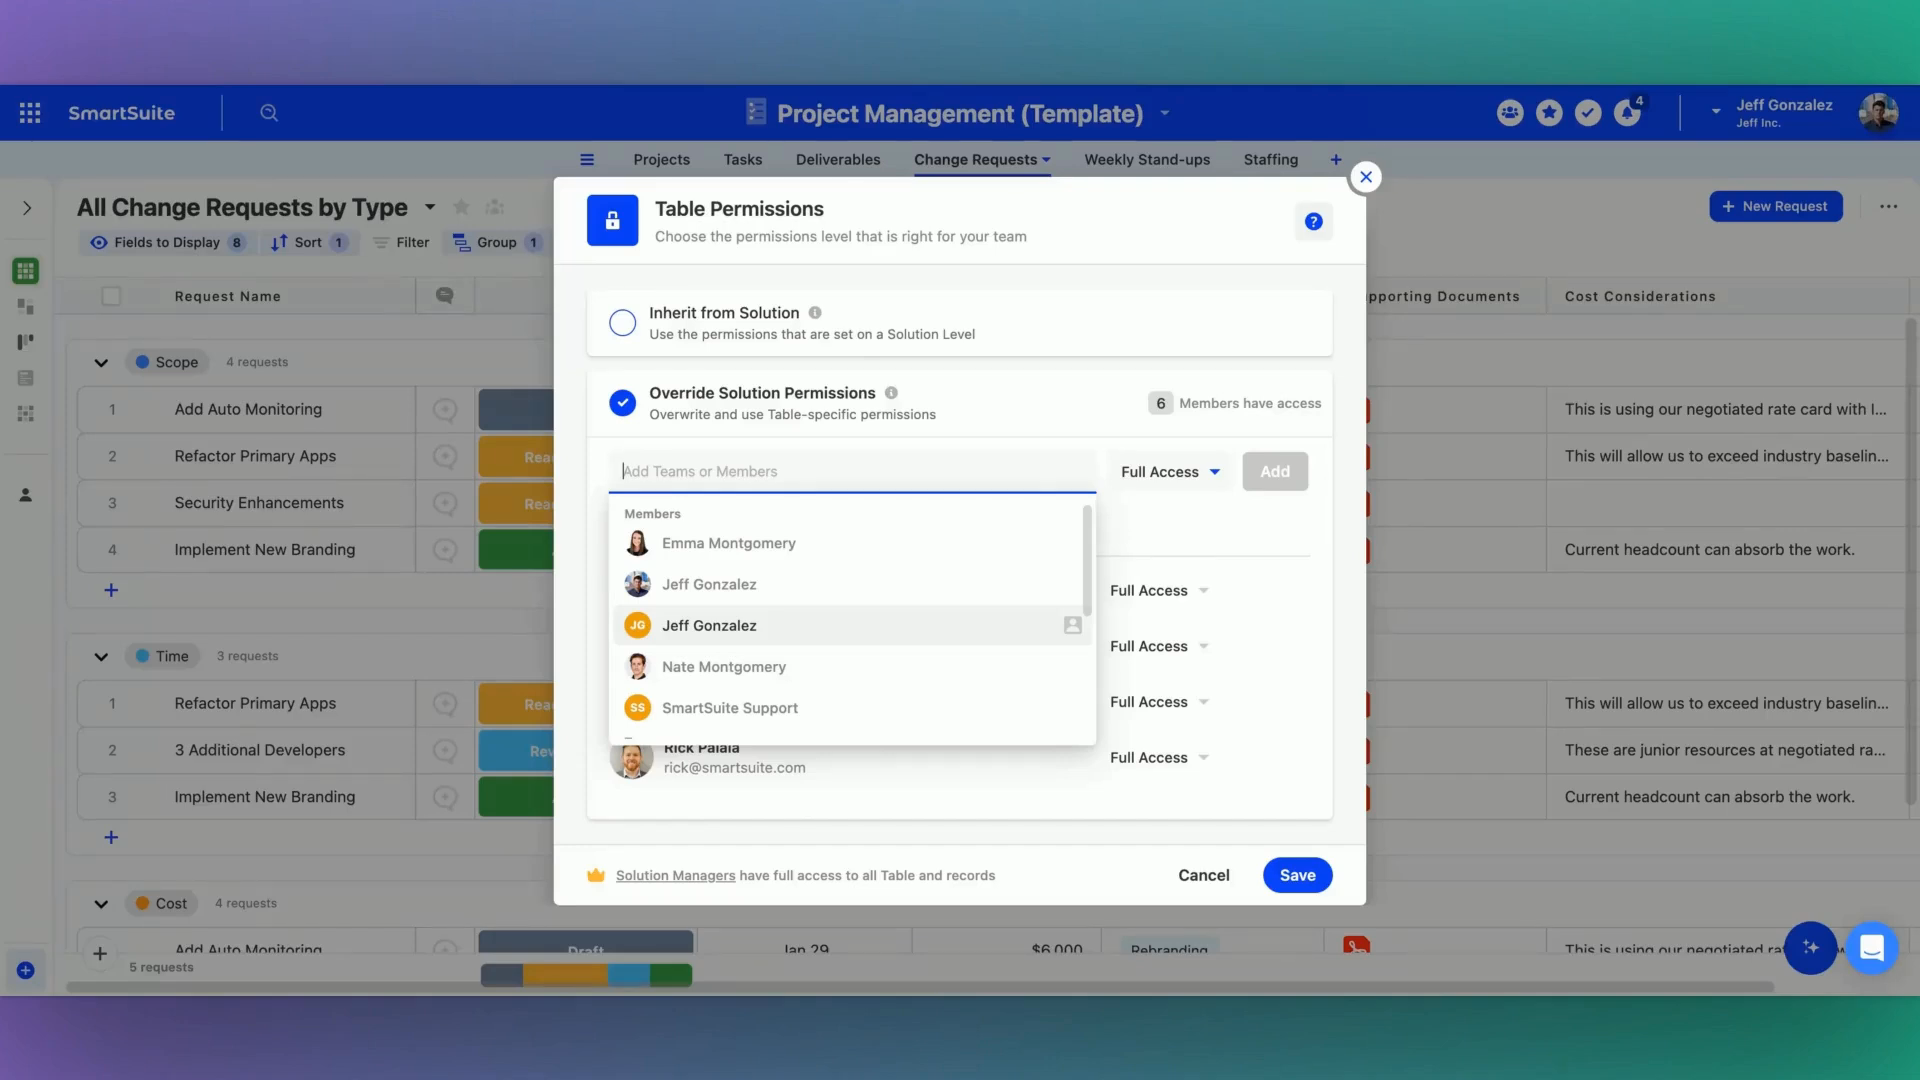
Granting Permission at the Table Level
Once you've set permissions at the solution level, you can also set permissions for individual tables within your solution. This allows for more granular control over who can access and modify specific data. To set table-level permissions, navigate to the table drop-down menu.
For instance, you might not want everyone to have access to change requests. Maybe you only want a small group to review these requests. In this scenario, you can restrict access to the "Change Requests" table to ensure that only the necessary team members can view and edit it.
Customizing Views for Different Users
When you switch to the user granted specific permissions, you'll see what the experience looks like from their perspective. They won't be able to see restricted tables like change requests or weekly stand-ups if they don’t have access. This helps to keep their workspace simple and focused on their specific tasks.
Field Level Permissions
Next, let’s talk about delivering permissions at the field level. Suppose you have a projects table with a view that outlines budget information. You can display or hide fields using the fields to display menu. Although someone with access might create their own view, they could still open a record to see all the data within that record.
So how do you ensure that only certain people see specific fields? You can do this through the field level drop-down menu. Here, you can edit field permissions to control who can view and who can edit individual fields.
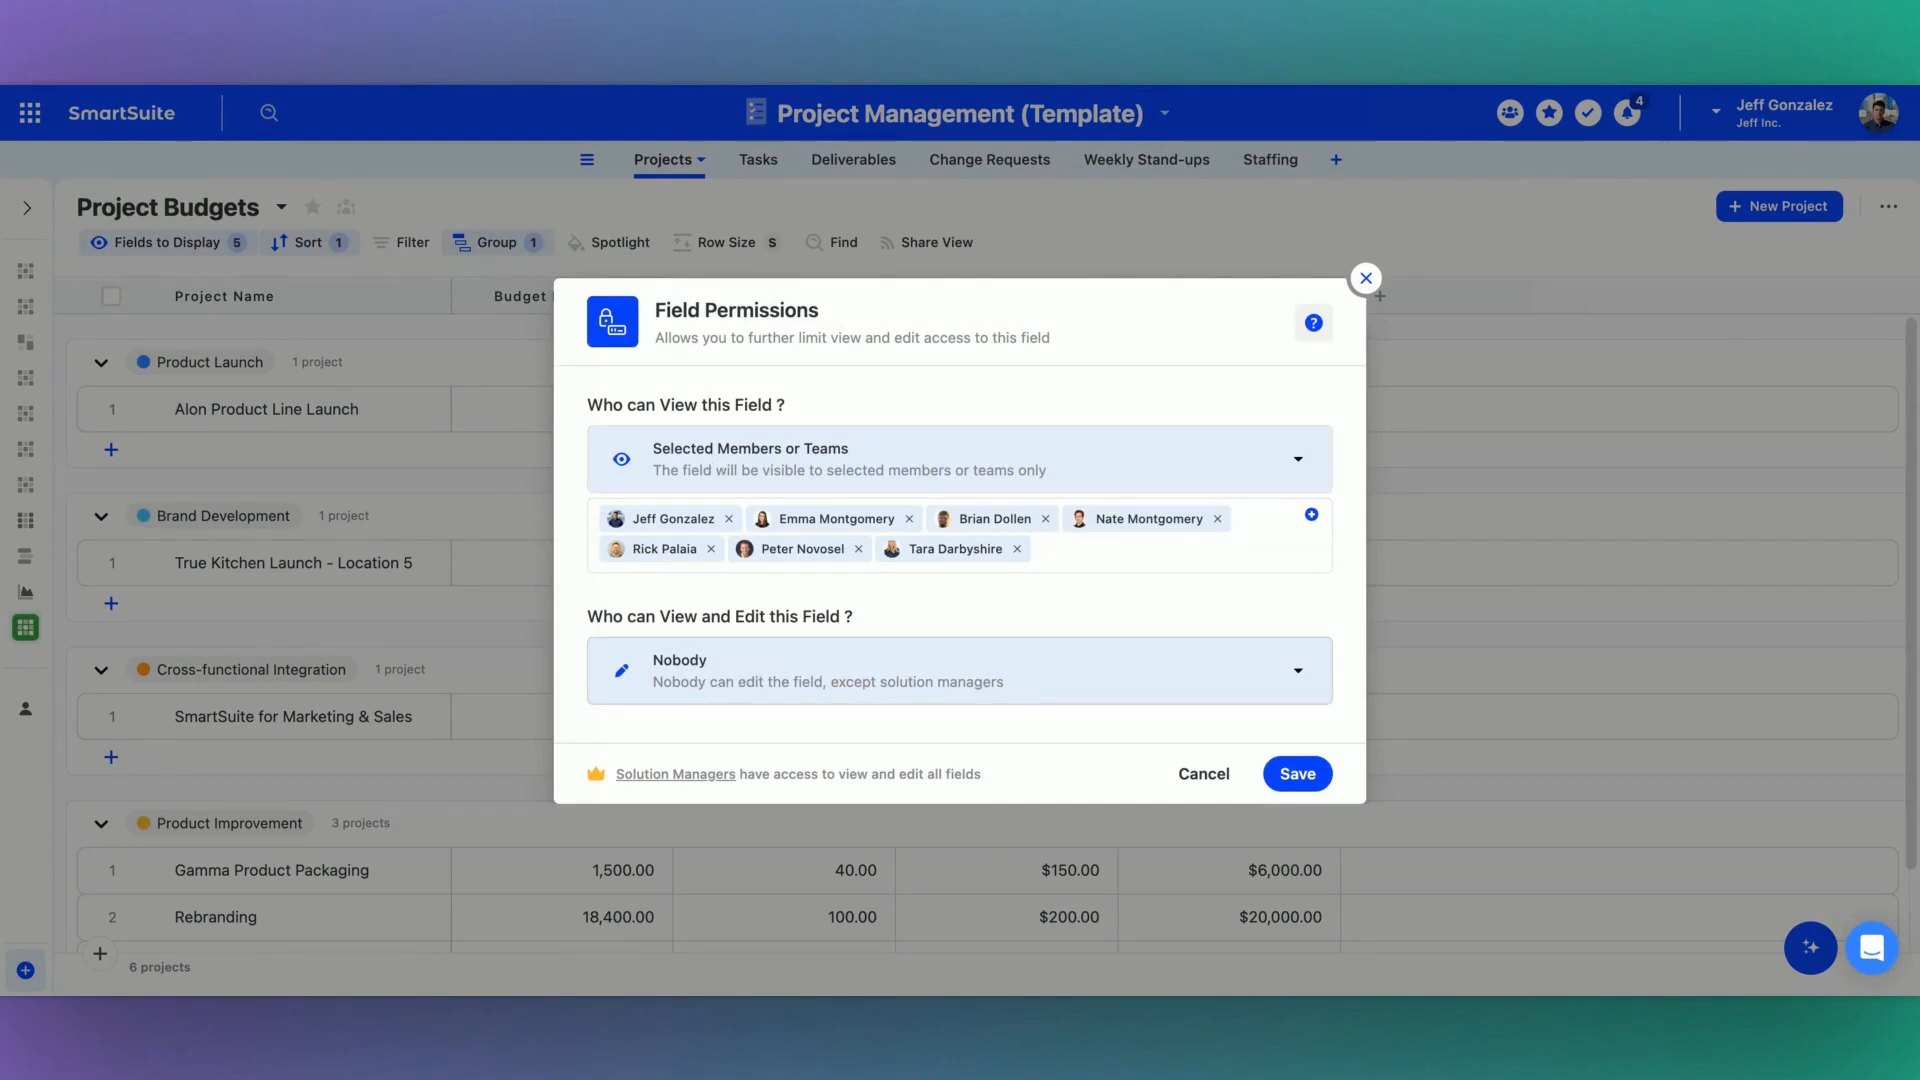
Setting Specific Field Permissions
Begin by defining who can view and edit a field. In some cases, you may not want anyone to edit a field but allow a handful of people to view it. You have the flexibility to specify:
- Everyone except certain people
- Selected members or teams
- No access for viewing or editing
This detailed control helps you tailor the user experience to fit your specific needs.
End User Experience
Now that all permissions are set, let's switch gears and see what the experience looks like from the end user's perspective. When an end user logs in, they won't see any solutions in their workspace unless they have been granted access. As soon as the solution manager or account administrator grants them access, the solution will immediately appear in their workspace without the need to refresh the page.
Simplified User Experience
When an end user opens the solution, they'll see everything their permissions allow. They won’t have access to restricted tables like change requests or weekly stand-ups, providing a streamlined and simplified experience. They'll focus only on relevant sections like projects, tasks, deliverables, and the staffing table.
In the projects table, they might see a blank view for budget fields if they're not granted access. This means they won't have unnecessary information, and they can focus on their tasks without being overwhelmed by irrelevant data.
Conclusion
In summary, configuring permissions at different levels—solution, table, and field—allows you to deliver a customized and streamlined experience for your team. You have the flexibility to control exactly what each user can see and do, enhancing both security and usability. The ability to customize permissions ensures that every user only has access to what they need, making your workspace both secure and efficient.
Thanks for watching and happy customizing!
SmartSuite provides work platform for standardizing workflows in the following areas:
- Governance, Risk & Compliance
- IT & Service Ops
- Project / Portfolio Management
- Business Operations


