


Alternatively, you could be a seasoned project leader who wants to refresh their knowledge and rethink their project management process.
Either way, I’ll walk you through our 10-step project management checklist to help you get up and running with PM in 2025.
Without wasting time, here’s the step-by-step checklist:
The 10-Step Project Management Checklist
Here’s the 10-step project management checklist that I use with my team at SmartSuite:
- Define the project scope: Clearly outline the project’s objectives, deliverables, and boundaries to ensure all stakeholders have a shared understanding of its goals and limitations.
- Create a detailed project plan: Develop a comprehensive roadmap that includes tasks, timelines, and resource allocation to guide the project from start to finish.
- Identify the key stakeholders: Determine who will be the key players in the project and engage them to align expectations and secure their commitment.
- Allocate resources: Strategically assign human, financial, and material resources to ensure tasks are completed efficiently and within budget.
- Assign roles and responsibilities: Define clear roles and specific duties for each team member to enhance accountability and productivity.
- Establish communication channels: Set up a structured communication plan to ensure consistent information flow among stakeholders and team members.
- Manage risks: Identify potential risks early and create mitigation strategies to minimize their impact on the project’s success.
- Conduct a kick-off meeting with everyone involved: Align all participants by reviewing the project plan, objectives, and expectations at the outset.
- Monitor progress: Regularly track milestones, assess performance, and adjust plans as needed to keep the project on course.
- Set up time tracking: An optional final task to make sure that everyone contributing is getting paid for the hours contributed.
Let’s go over each step with more details, templates, and pro tips: 👇
➡️ For consistency purposes, I’d take the example of a ‘’website migration’’ as a project because it’s a complex process that most of us can relate to.
1. Define the Project Scope
The first step is to clearly articulate the project scope, including:
- The goal of the project: Successfully migrate the website abc.org to abc.com with a fresh re-design.
- The objectives of the project: Migrate the website without losing organic traffic, and while optimizing the new website for both Google and user experience.
- The deliverables of the project: The creation of new page templates for the product and category pages, a technical SEO audit before and after the new website, creation of an article template, etc.
- What the big plan will not include: The website migration will not include re-designing the mobile app of the platform.
➡️ This is the stage where you want to start thinking about constraints and assumptions to set boundaries for the project.
For example, this is the stage where you identify that you’ll need SEO resources, be it from your internal team or an external agency to work with, to oversee the migration process.
💡 You can use an IT project management software like SmartSuite (that’s us) to create a centralized record for scope details.
SmartSuite offers 40+ field types to document objectives, deliverables, and constraints.

You can use our project management template and play around with it (yes, this is a template that you can use).
2. Create a Detailed Project Plan
To create a detailed project plan, you will need to identify all tasks that are required for the project's completion based on the original scope.
Let’s take a look at all of the tasks required for a website migration project:
- Conducting a technical SEO audit by the SEO team to spot technical issues from the previous website and figure out which pages need to be transferred over.
- URL remapping of the old pages that will be transferred over to the new website’s pages.
- Designing the new website’s home page, product pages, and category pages.
- Benchmarking the performance of the current site to evaluate the post-migration changes in organic performance.
- Creating a backup of the previous website in case of an emergency.
- Creating the new article template that will be used by the SEO team to publish articles.
- Etc.

Each of these tasks needs to have a timeline for completion, dependencies, and milestones.
I’d recommend you to build the project plan with one of SmartSuite’s pre-built templates (e.g., in this case, for software development).
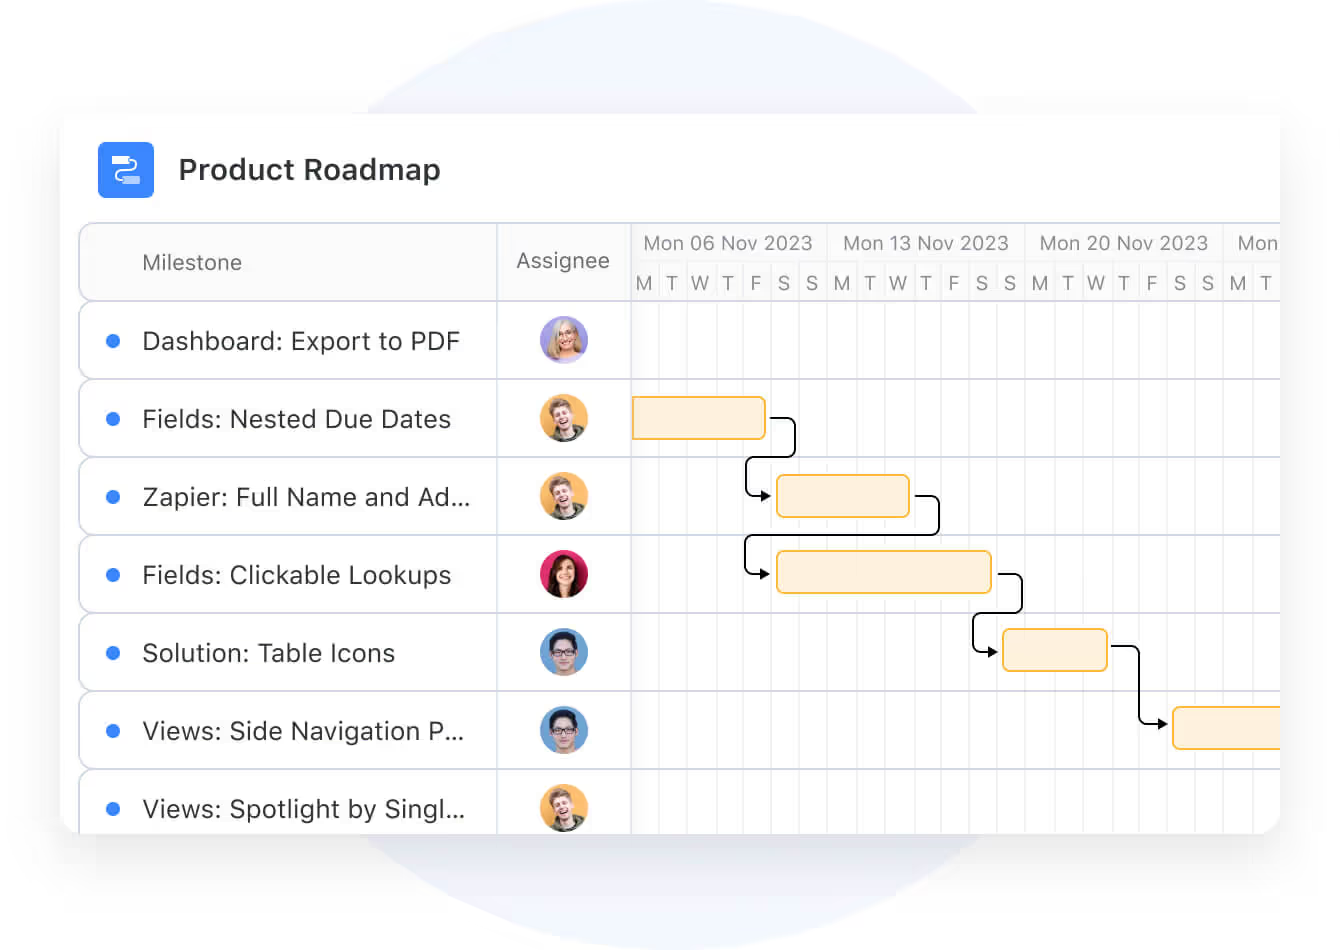
You can use a Gantt chart or a Timeline view to map out the dependencies (what tasks need to be done for another task to start) and auto-schedule tasks based on delays.

SmartSuite’s Gantt Chart provides a bird’s eye view of milestones and dependencies, simplifying complex project structures with drag-and-drop timeline adjustments.
Learn more about SmartSuite’s Gantt chart view:
➡️ It’s better to break down the tasks into different categories depending on the project scope, such as:
- Stage #1: Pre-Migration.
- Stage #2: During Migration.
- Stage #3: Post-Migration.
💡 You can further break down the tasks into smaller tasks until they seem manageable.
3. Identify Stakeholders
Next up, you want to identify all of the stakeholders that will be involved in the project, including co-workers, freelancers, agencies, and those who will be paying for the whole thing.
If you do project management for a large enterprise with plenty of co-workers, you can use SmartSuite’s Member Directory to view team availability and assign tasks based on capacity and skillset.
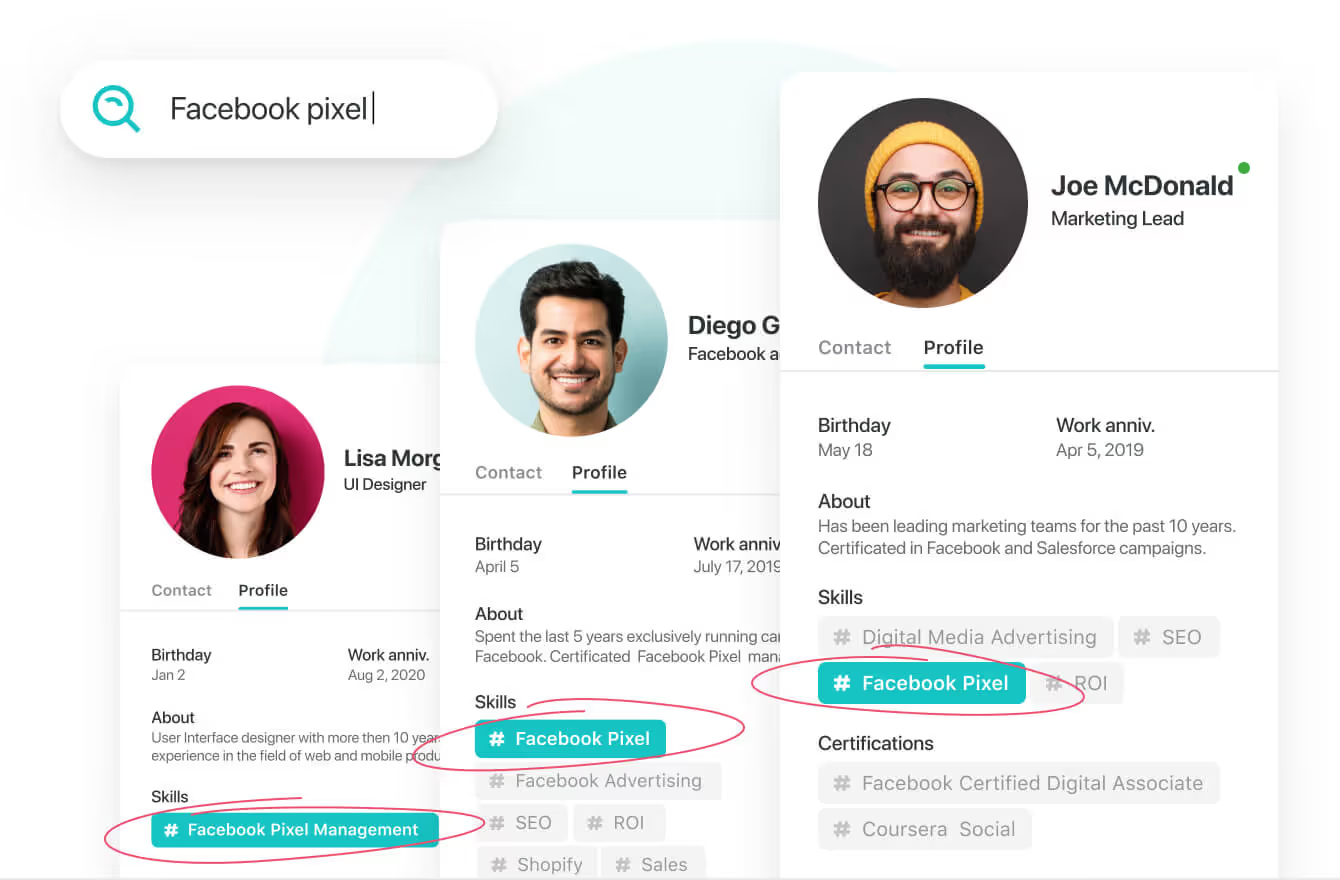
➡️ Pro Tip: What I’d recommend is to engage these people as early as possible to find out how busy they are and whether they’d have the capacity to help you.
After you have identified all of the stakeholders, you want to put them all in one place so you can visualize them (more on that in the next section).
This is also a good opportunity to figure out where the gaps are.
💡For example, you might find out that in your company, there are no resources available for a creative lead to oversee the new website’s user interface.
This might nudge you to look for alternatives, such as freelancers or someone in your company who knows creative project management.
4. Allocate Resources
In the resource allocation phase, you want to assign necessary resources to the project, such as personnel, budget, equipment, and materials required for you to do the project successfully.
Resource management includes the efficient allocation of resources, both human and material.
Failing to plan resources might result in your project getting delayed or having to request more resources from your stakeholders.
Considering that organizations waste 12% of resources due to poor project management, you cannot be spending your organization’s money left and right.
From our website migration project, that’d be:
- Software development costs, including headcount and software.
- SEO costs, including headcount and software.
- Creative costs, including headcount and software.

I personally use SmartSuite’s Card View to visualize all of the stakeholders involved in the projects I’m working on.
➡️ The reason why we want to strategically plan out our resources is that we want to minimize waste and make sure that every dollar spent will be going to the success of the project.
This will also help you stay ahead of resource bottlenecks.
5. Assign Roles and Responsibilities
Assuming that you’ve got your required budget and that you’ve got every stakeholder mapped out, you want to start assigning roles and responsibilities.
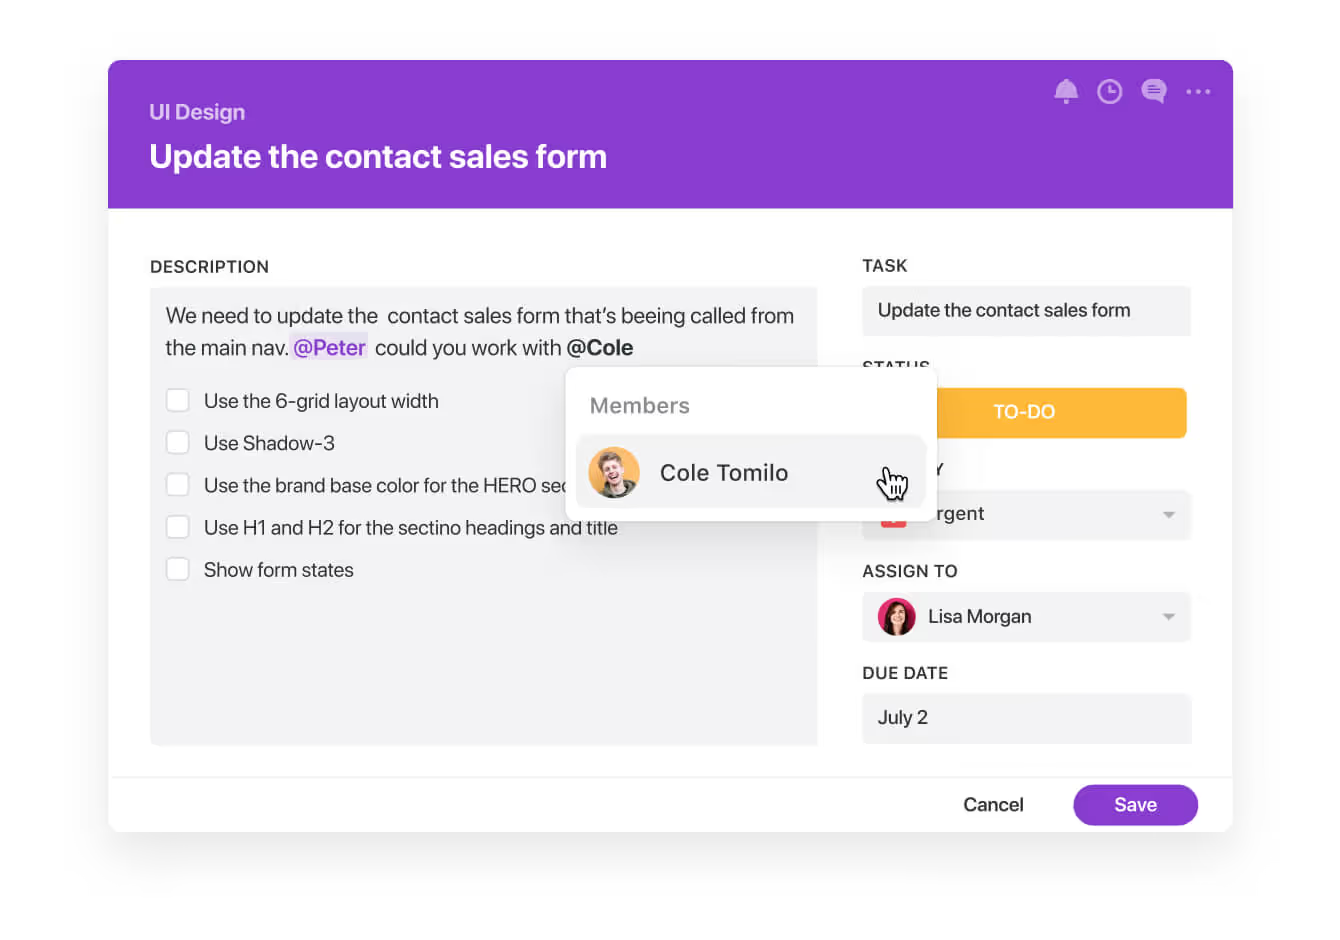
Assign responsibilities based on the team’s expertise, with clear deadlines and expectations for each task (and sub-task) to ensure that each stakeholder understands their role in the project.
Each task needs to have:
- A description that clearly outlines what needs to be done.
- Task owner and completion criteria.
- A pre-defined starting point and due date.
➡️ Pro Tip: You can use SmartSuite’s Kanban view to create the project roadmap and enable your stakeholders to visualize it.

Your team can then click on each specific task and expand its details to learn more about what’s required of them.
Learn more about the Kanban boards at SmartSuite and how you can set them up:
6. Establish Communication Channels
Figuring out the collaboration aspect of your project management workflow is the next step.
Most teams enable real-time collaboration with integrated chat, file sharing, and comments with a tool like Slack that is outside of their project management solution.
💡 Instead of having to use a tool like Slack or Microsoft Teams, you can centralize your communication in SmartSuite using our embedded comments and document sharing to avoid having discussions all over the place.
SmartSuite makes it possible to unite your multiple teams or companies you’re working with by facilitating communication directly within SmartSuite’s records.
Inside the platform, your team members can ‘’@’’ someone, add notes or attach an image, and view the design, sketches and wireframes — all without needing to shift context or log into an external system.
➡️ After that, you should create a communication plan, including meetings (e.g., bi-weekly catch-ups) to gauge progress.
In our example of the website migration process, we have identified that our key stakeholders are going to be the website developers, SEO team, and the designer(s), which is why they need to have regular catch-ups.
7. Manage Risks
The next step in the project management checklist is preparing for risks and tracking potential risks or bottlenecks that could impact the project’s success.
By ‘’risks’’ I mean technical, financial, and operational issues that could realistically happen with the goal of assessing their likelihood and potential impact.
Data shows that projects that deliver on time and on budget are perceived as successful 64% of the time.
You can use SmartSuite’s project risks and issues template to visualize what risk management looks like: 🔽

Our risk management template above has the following fields:
- Likelihood of the risk of occurring, such as an employee being sick on the exact date of presenting the project, from 1–5.
- The potential impact that could have on the project’s outcome, from 1–5.
- The total risk score that is calculated by multiplying the likelihood of the risk by its potential impact on the project.
- The mitigation plan summary, where the project leader has outlined the accurate response to the crisis.
You and your team can keep a tab of the existing issues that have been identified, such as an issue with the server during the website migration.

You can play around and customize the risk management template here.
After you have identified the potential risks, you want to come up with mitigation strategies for the high-impact risks.
➡️ In our website migration example, one of the main risks would be losing access to the back-end of the new website (e.g., after a crash), which is why a mitigation strategy would be to create a backup of the old website just in case.
8. Conduct a Kick-Off Meeting
You want to formally start the project by introducing the team and all of the stakeholders involved.
This crucial step is where you communicate all project requirements, goals, timelines, and expectations to everyone involved.
In the kickoff meeting, you can share the Kanban board and Gantt chart with the project team.
➡️ It’s a good time for everyone to get familiar with one another, especially if it’s the first time working together.
In the example of the website migration project, the kickoff meeting will include:
- Timelines for each task to be completed.
- Discussions around dependencies between the SEO, development, and design teams.
- The different stakeholders getting to know each other.
- Setting up the bi-weekly catch-up to keep track of the progress.
9. Monitor Progress
The last step of the project management checklist is to track the progress against the project plan and original scope.
The goal is to regularly track milestones, assess performance, and adjust plans as needed to keep the project on course.
But how can you realistically do that at a glance without having to spend hours messaging everyone individually?
You can monitor the progress of the project via a custom dashboard, where you can aggregate any of your data into a single view to keep track of all tasks.

You won’t have to dig for information from all over the place. Instead, you can understand relationships, evaluate dependencies, and track metrics that measure the state of your project.
What’s more, you can use SmartSuite's dynamic widgets to embed charts, calculate and track metrics, or summarize in tables.

This will help you identify obstacles, and take appropriate action on tasks that are taking too long to get done or when someone is waiting on a dependency.
Do you want to double down on monitoring progress?
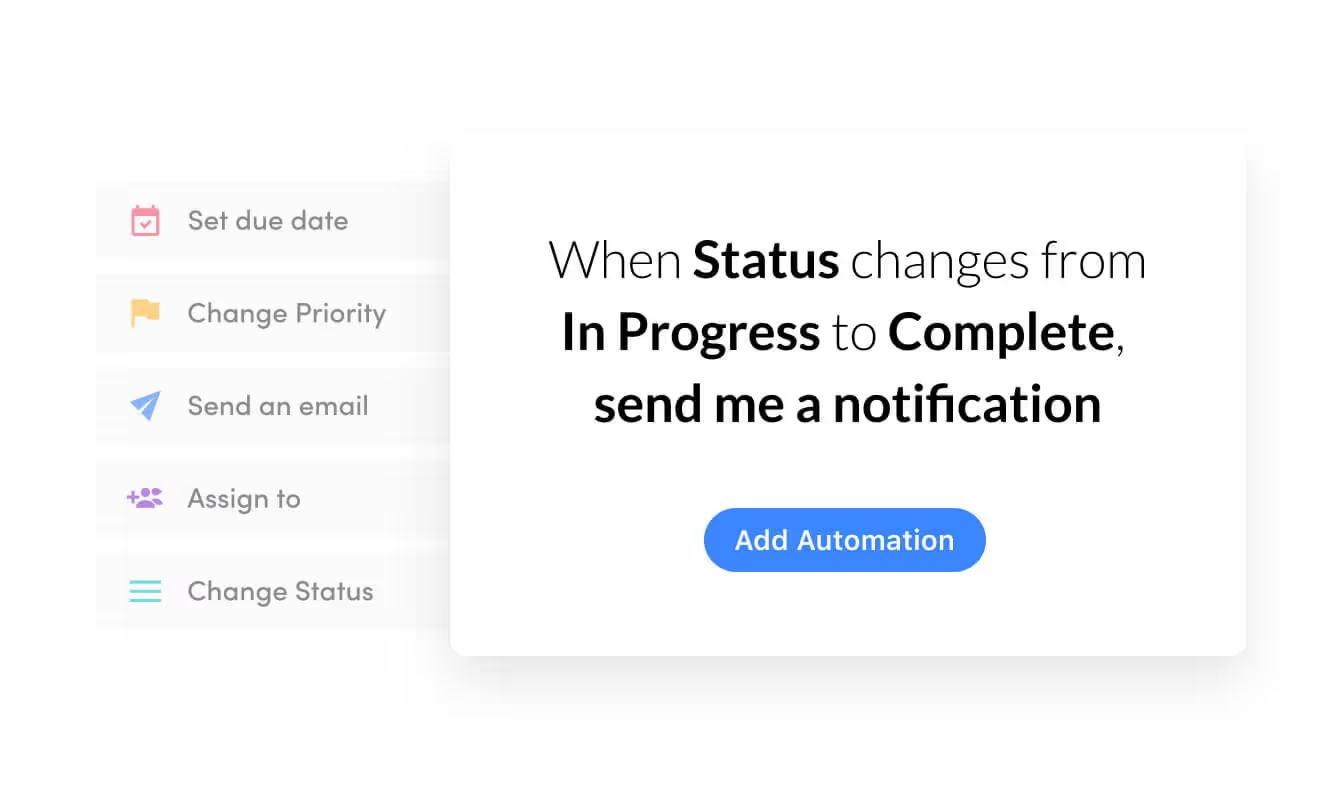
You can set up automations to track your team’s task progress using SmartSuite’s no-code automation builder.
Here’s how it works:
- Select fields (e.g., due dates, linked records, priority levels) to structure task data.
- Apply automation rules, such as recurring tasks (e.g., weekly check-ins) or status-based triggers (e.g., auto-assign tasks when marked "In Progress").
- Link related records (e.g., you can connect a "Design Phase" task to a "QA Phase" task) to visualize dependencies.
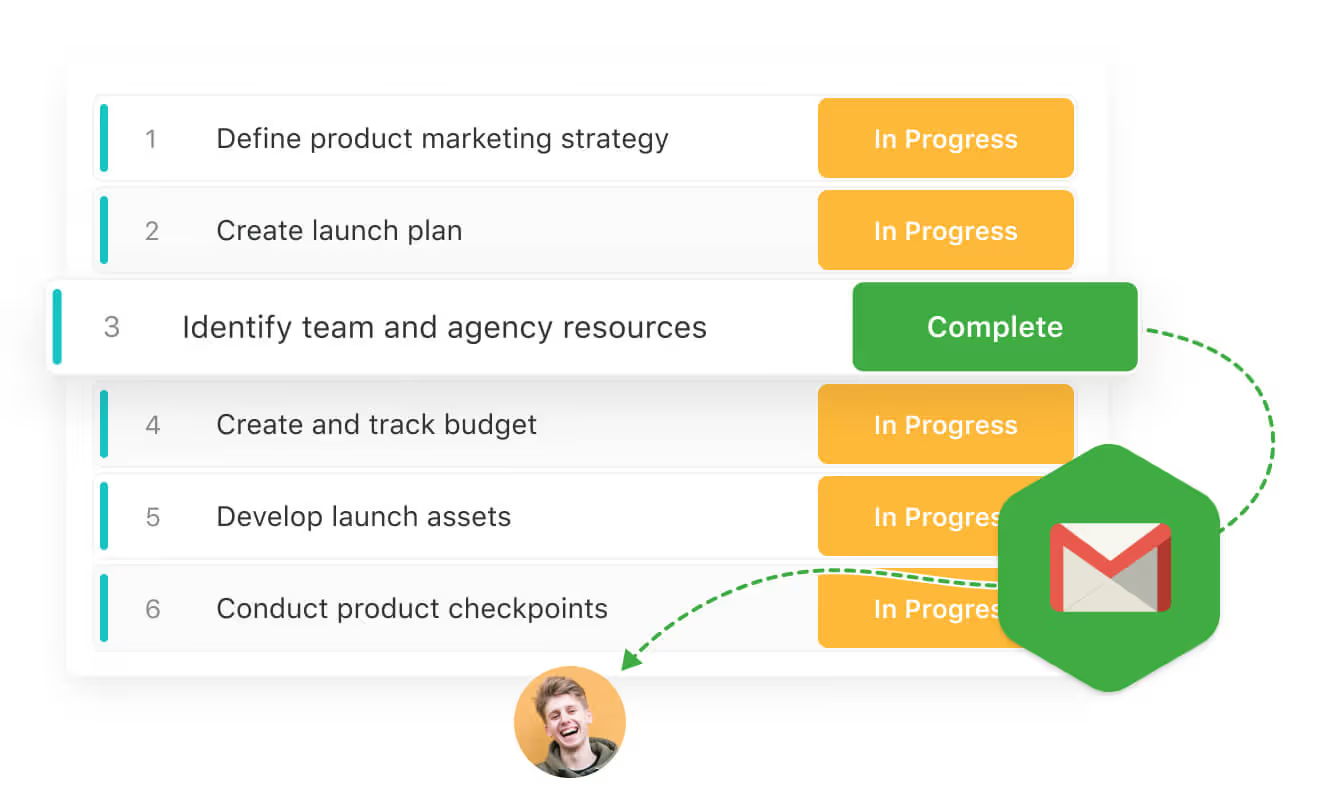
For example, instead of your SEO team constantly checking in on your development team for status updates, they can use our dynamic notifications automation that instantly triggers email sends when critical tasks are completed.
10. (Optional): Set up Time Tracking
If you are working with freelancers or any kind of independent contractors, your HR team will want to create a place where they can track their time and calculate their billable hours to pay them.
Here’s how tracking time sheets for freelancers and/or employees looks inside SmartSuite’s time tracking template:

Your contractors can submit the hours they’ve worked and the type of work they have done, so you can track your spending per department and category.
You can also add a field with our customizable platform for ‘’work summary’’ so the workers can explain their output for the billed hours.
➡️ Pro Tip: You can build a place where you can track all your employees, including their titles, phone numbers, offices, emails, salaries, and statuses.

You can play around and customize the time tracking template here.
Why do you need a project management checklist?
The reason why you need a project management checklist is because you want to improve the organization of all tasks, stakeholders, and budgets to gain clarity into the bigger picture.
You want to be able to ensure a clear overview of responsibilities and priorities for everyone involved to prevent confusion and protect yourself from scope creep.
Other benefits of having a project management checklist include:
- Reducing the risk of oversights: By listing all necessary tasks and steps, checklists act as a safeguard against forgetting critical actions or details in the project management workflow.
- Improving accountability and tracking: Assigning specific tasks to team members through a checklist provides a way to monitor progress and evaluate each co-worker.
- Finding dependencies early on so they do not appear later down the road when contributors do not expect them.
- Facilitating efficient resource allocation: Checklists help project managers plan and allocate resources such as time, budget, and personnel efficiently.
- Supporting consistency and quality control: By standardizing processes and documenting best practices, you can ensure predictable outcomes for everyone involved.
Next Steps: Get Started With SmartSuite & Our Templates For Free
Well, that was it – our 10-step project management checklist to help your team get started.
If you’re a project manager looking to streamline your project management workflows, you can give SmartSuite a chance with our free plan.
SmartSuite’s platform offers just the right customization, native collaboration capabilities and a library of 200+ project management templates to help teams create and maintain a project management workflow.
Here’s what's in it for your team when you try SmartSuite:
- Access to a generous free plan with features including multi-board views (Kanban, Chart, Map, Timeline, Card, and Calendar), 100 automations/month, and 40+ field types, including formula and linked record fields.
- No-code automation builder to set up to 500,000 trigger/action workflows.
- Built-in productivity tools, including time tracking, status tracking, and checklists.
- Team collaboration and planning tools such as whiteboards and SmartSuite docs.
- Resource management across projects and teams.
- 40+ field types, including the option to add your custom fields.
Sign up for a free plan to test the water or get a 14-day free trial to explore all its amazing features.
Or, if you’d like to talk to our team of experts, schedule a demo.
Read More
- The 10 Best Project Management Software For Engineers: We break down the top 10 project management solutions built with engineers in mind in 2025.
- 10 Best Healthcare Project Management Tools in 2025: Find out the best healthcare project management solutions on the market.
- 10 Best Project Management Software for Construction in 2025: A useful guide if you operate in the construction industry and you’re looking for a project management app.
- 10 Best Enterprise Project Management Software: Find more about the best Enterprise-grade project management solutions on the market.
- 10 Best Project Management Tools For Remote Teams In 2025: Learn more about the best project management tools for remote teams in 2025.
- 10 Best Project Management Tools For Consultants In 2025: Find out the best project management solutions for consultants.


.jpg)


