How to Use and Customize Solution Templates in SmartSuite
Welcome back to another episode of SmartTips! I’m Gavin Brennen, a Product Specialist here at SmartSuite, and today we’re diving into a topic that’s essential for anyone just getting started on the platform: Solution Templates.
If you’ve heard of templates in SmartSuite but aren’t quite sure what they are, how to use them, or how to make them your own—this guide is for you.
What Are SmartSuite Solution Templates?
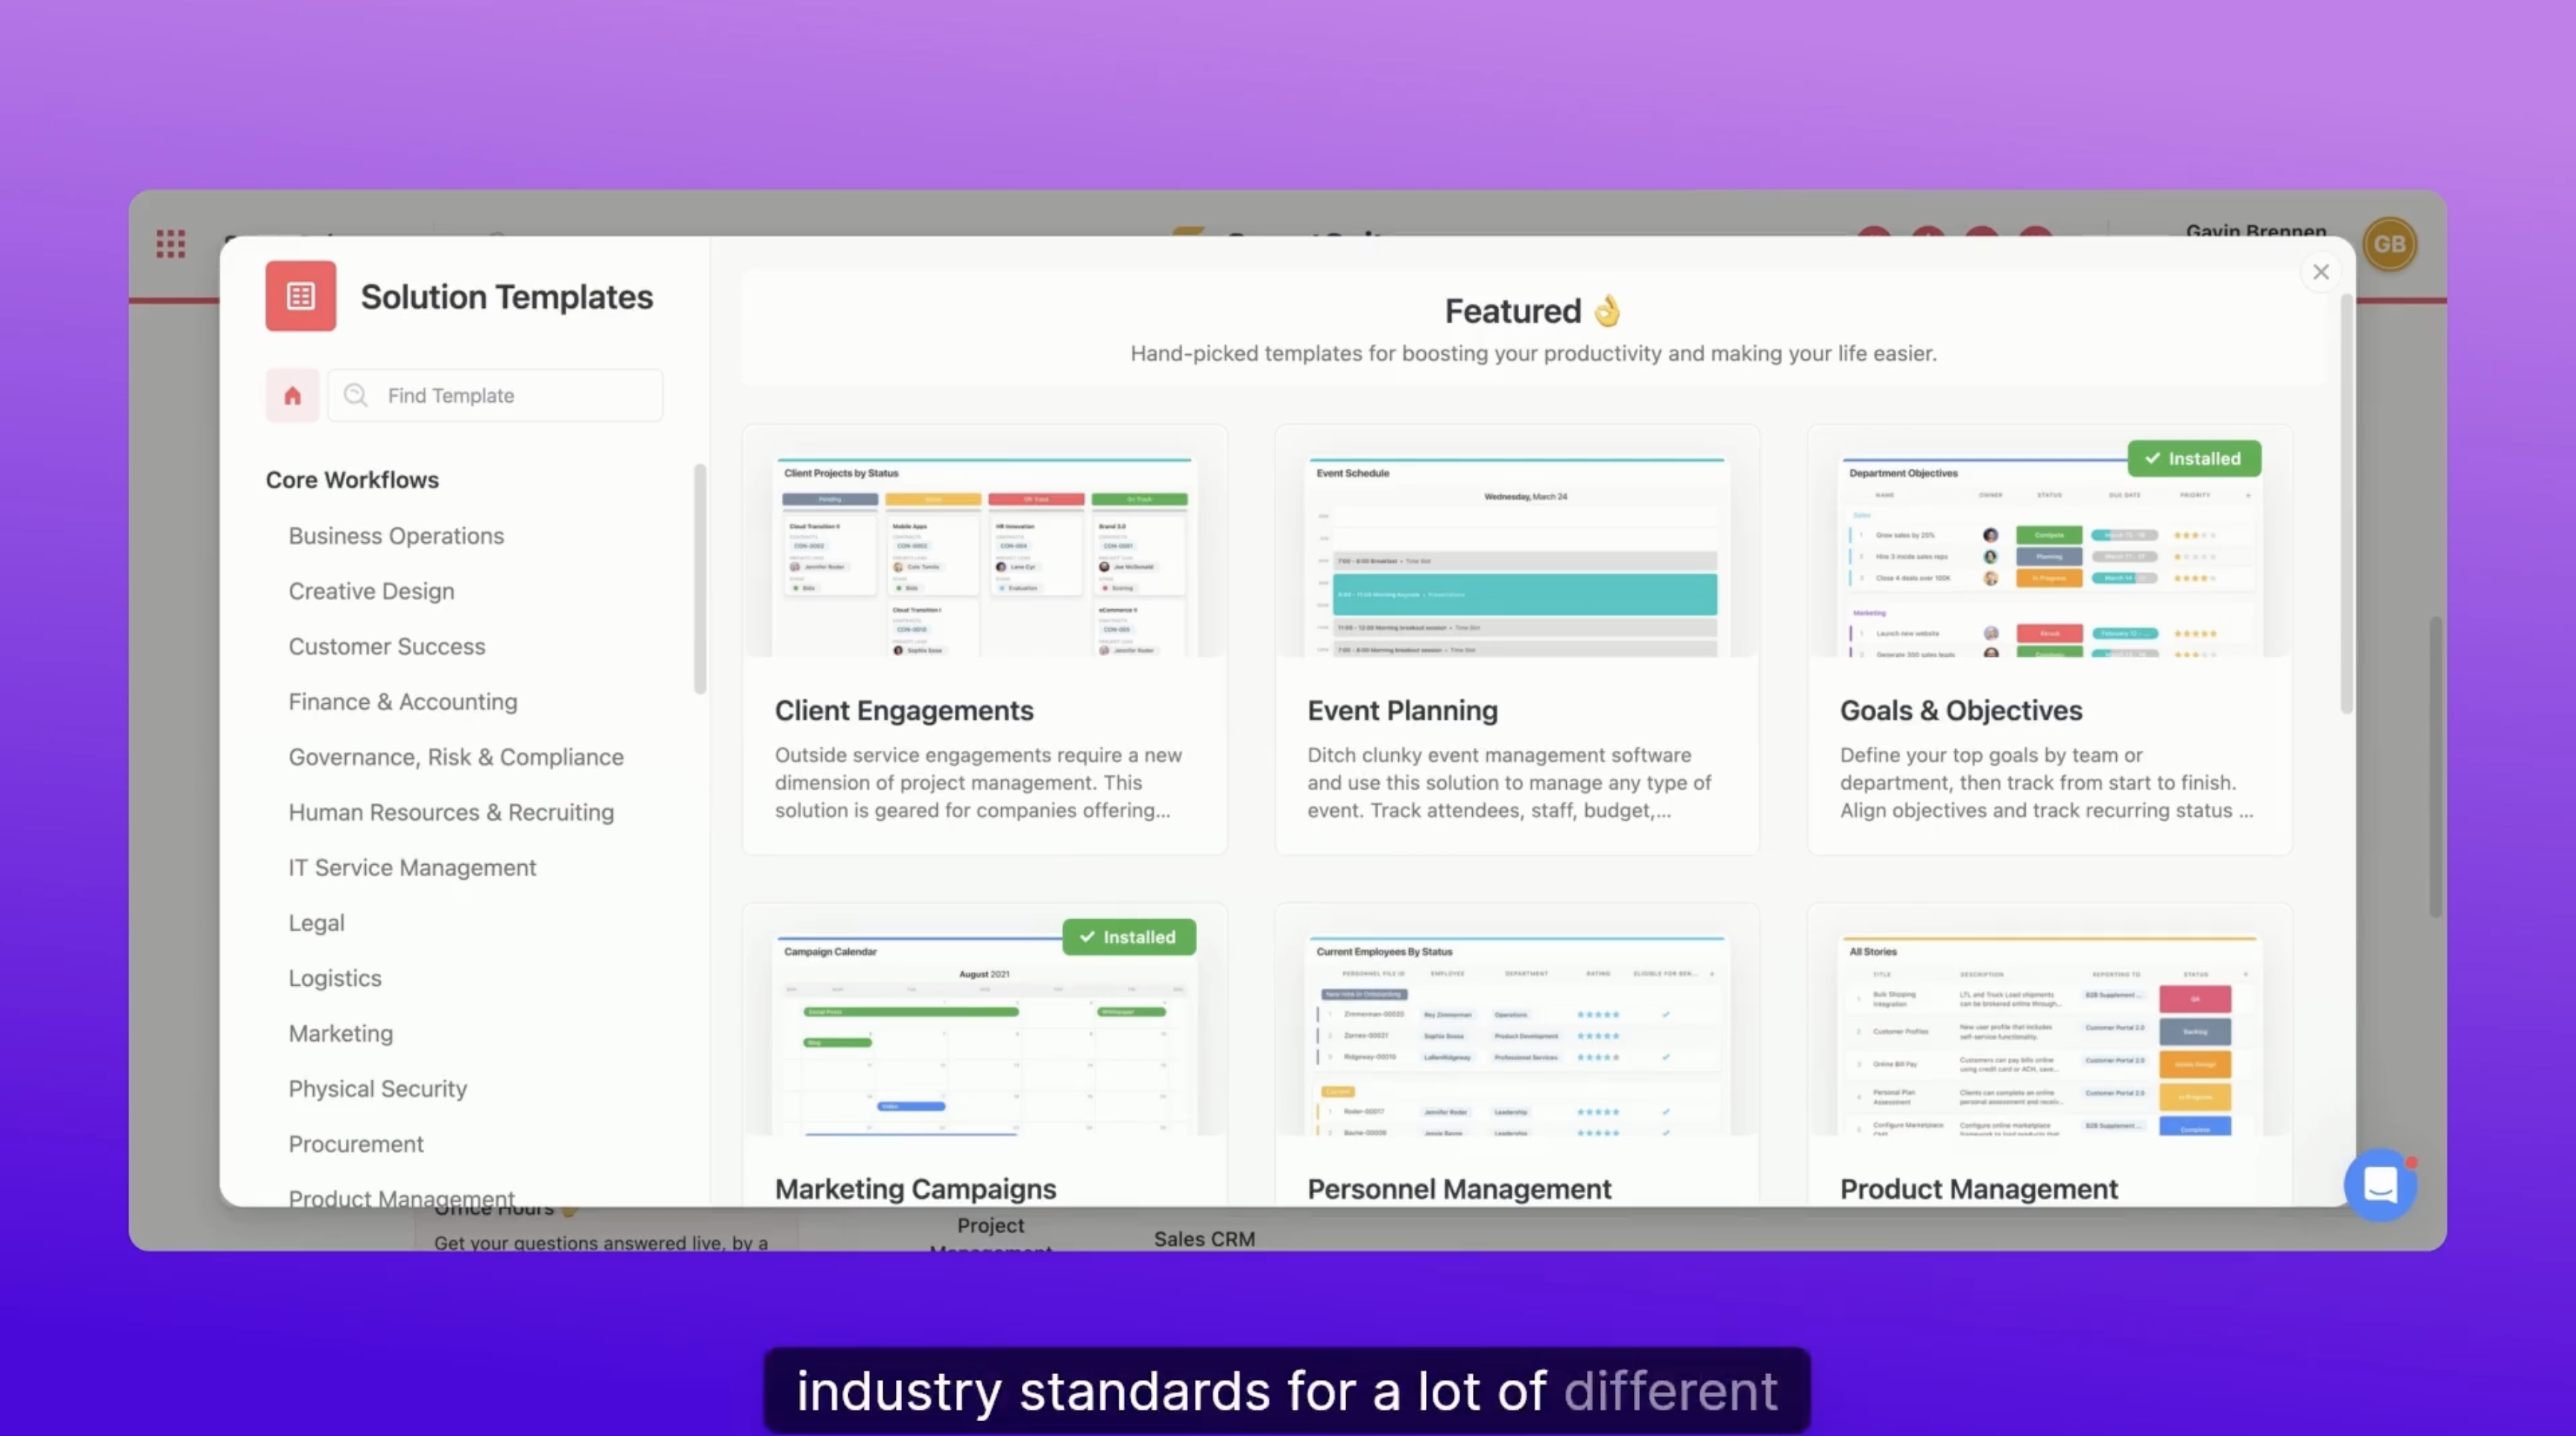
Solution templates are pre-built SmartSuite setups designed to meet industry standards across a variety of workflows and use cases. With 200+ templates available, you can quickly launch fully-structured solutions tailored to:
- Sales and CRM
- Marketing
- HR and Recruiting
- Project Management
- And many more industries!
How to Add a Solution Template
There are a couple of easy ways to get started with templates in your SmartSuite workspace:
- Navigate to the Template Gallery
On the left-hand menu, click the Resources tab, then select Template Gallery. - Browse or Search Templates
- Use filters on the left to browse by workflow category or industry.
- Use the search bar to find something specific—e.g., “Sales CRM”.
- Preview the Template
Click on a template to view:- A detailed description
- Images of the solution
- A live demo
- Click “Use Template”
With one click, the template will be downloaded directly into your workspace.

What’s with the Demo Data?
Each template comes with demo data so you can see how the solution works in action. This includes mock records across all tables and fields.
But don’t worry—these aren’t real people or real companies. It’s all just to show you the flow and structure of the template.
Customizing Your Template
To make a template your own, follow these steps:
1. Review the Structure
Start by reviewing how the tables are linked:
- For example, a Sales CRM might include:
- Accounts → Contacts → Opportunities
If the structure works for your process, great! If not, you can:
- Add new tables
- Delete or rename existing ones
2. Edit Fields and Columns
Not all default fields will be relevant to your business.
- To delete a field, just click and remove it.
- Example: If you don’t need PDF uploads for each account, delete the "Account Files" field.
- To add a field, such as a currency field for estimated value:
- Click “Add Field” → Choose “Currency” → Name it “Estimated Value”
Now you have a custom field that better reflects your needs.
Deleting Demo Data
Once your structure is set, it’s time to clean up.
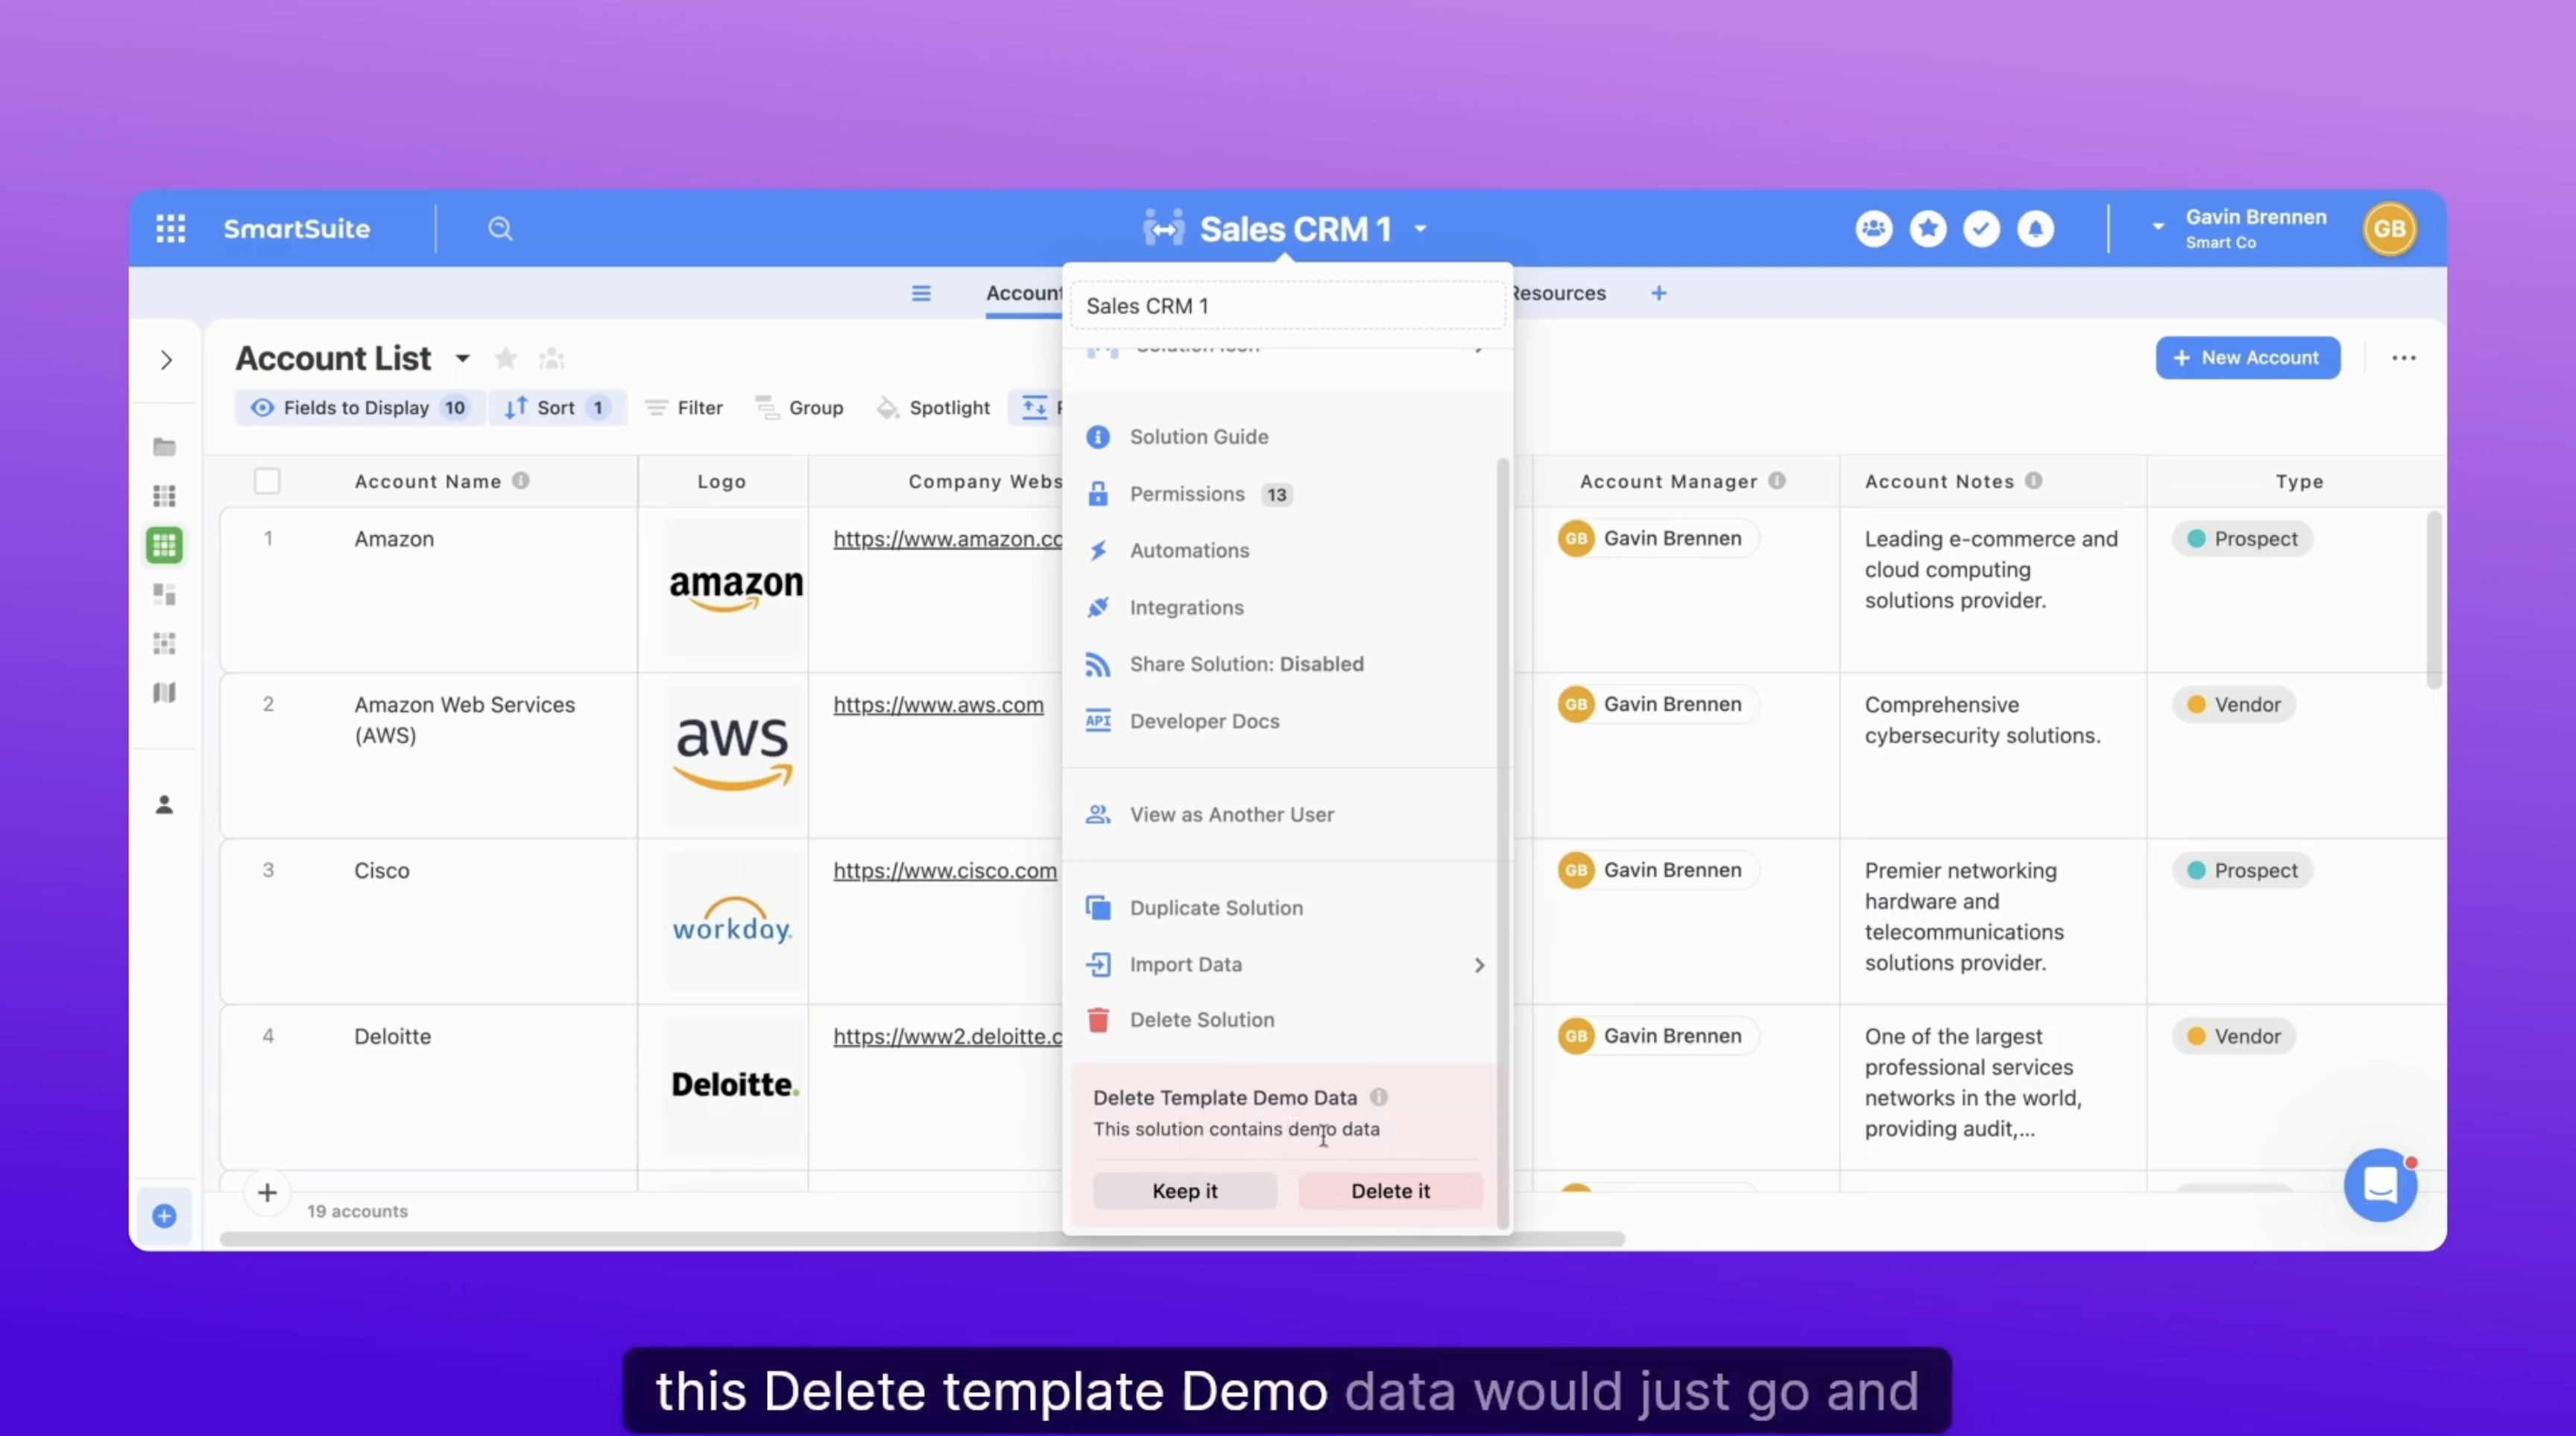
Delete All Demo Data in One Click:
- Click the solution title (e.g., “Sales CRM”)
- Scroll down and click Delete Template Demo Data
- Important: Do not click “Delete Solution”—that removes the entire solution!
- Confirm deletion, and the demo records will be wiped.
Note: Any new data you’ve added (like a custom account called “SmartSuite Smart Tips”) will remain untouched.

Final Thoughts
Solution templates are one of the fastest ways to get started with SmartSuite. Just remember:
- Browse the gallery for a template that fits your workflow.
- Customize the structure, fields, and tables as needed.
- Delete the demo data so you can start fresh with your real information.
This tutorial covers the basics, but we go even deeper in future episodes. If you're ready to level up your SmartSuite game, be sure to subscribe to our weekly SmartTips videos!
Got questions or want us to cover a specific topic in a future post? Drop your suggestions in the comments or reach out to us directly.
Until next time, keep enjoying SmartSuite!


.png)


